Desserts
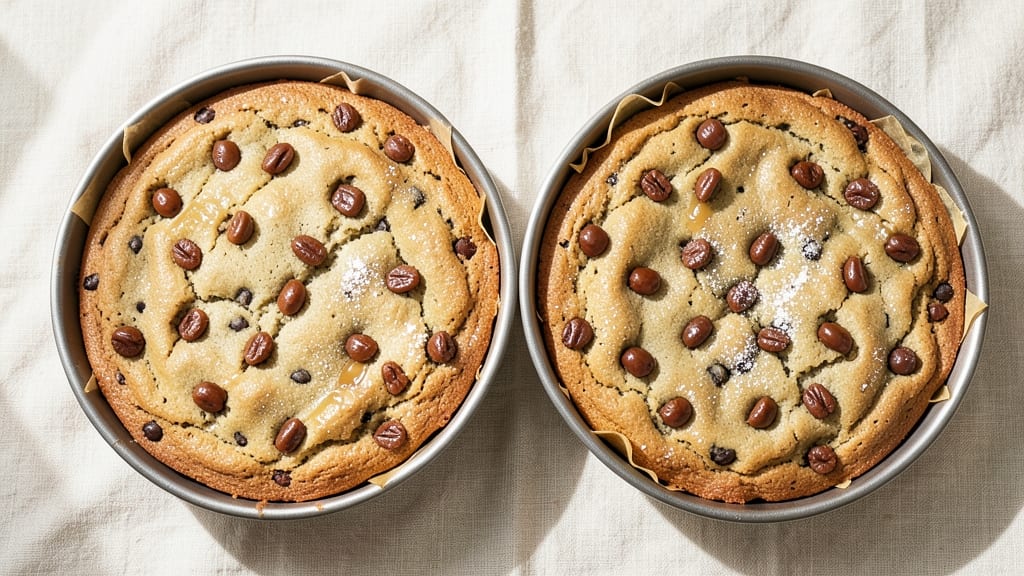
This Nestlé Toll House cookie cake recipe transforms the classic cookie into a decadent two-layered dessert that delivers all the crunch and fudgy magic you love. The secret lies in balancing melted Nestlé Toll House morsels with a buttery, tender cake base—creating layers of texture that make every slice irresistible.
After testing countless variations, this version consistently delivers that perfect balance of crisp edges and chewy centers, just like the original cookies but in cake form.
The recipe builds on the iconic Toll House formula by incorporating melted morsels into the batter, ensuring each bite delivers that familiar chocolatey crunch. With precise measurements and a foolproof baking technique, you’ll achieve golden layers that hold their shape while maintaining that signature cookie texture.
The cake’s rich flavor comes from combining butter, sugar, and eggs with just the right amount of vanilla and baking powder for a tender crumb.
By the time it emerges from the oven, you’ll have a cookie cake with a moist, tender interior and a crisp exterior that’s studded with melted chocolate morsels. The layers are generously filled with a creamy vanilla buttercream that ties everything together, creating a dessert that’s both impressive and comforting.
This recipe is designed to deliver restaurant-quality results with minimal fuss—perfect for birthdays, holidays, or whenever you crave a nostalgic treat.
Serve slices warm with a scoop of vanilla ice cream or dust with powdered sugar for an extra touch of elegance. The cake keeps well at room temperature for 3 days or can be refrigerated for up to 5 days, making it ideal for meal prep or gifting.
Let’s get baking!
Ingredients for nestle toll house cookie cake
Twelve ingredients, two layers of magic—this isn’t your average cookie recipe.
| Ingredient | Amount | Notes |
|---|---|---|
| Nestlé Toll House Morsels 🍫 | 2 cups | Unmelted, semi-sweet chocolate chips |
| All-Purpose Flour 🌾 | 2 ½ cups | Sifted for light texture |
| Unsalted Butter 🧈 | 1 ½ cups | Room temperature, full-fat preferred |
| Granulated Sugar 🍚 | 2 cups | White or light brown |
| Packed Brown Sugar 🍚 | ½ cup | Light or dark |
| Large Eggs 🥚 | 3 whole | Room temperature |
| Pure Vanilla Extract 🌸 | 2 tsp | Imitation-free preferred |
| Baking Powder 🍞 | 1 ½ tsp | Aluminum-free for best rise |
| Salt 🧂 | ½ tsp | Fine sea salt |
| Powdered Sugar 🍚 | 3 cups | For buttercream |
| Heavy Cream 🥛 | 1 cup | Cold for buttercream |
| Vanilla Bean Paste 🌸 | 1 tbsp | Or 1 tsp vanilla extract |
| Milk 🥛 | ¼ cup | For batter consistency |
The Nestlé Toll House Morsels are non-negotiable here. Grab the 15-ounce bag—it’s the real deal. I always buy mine at Walmart or Target since they stock the full-size bags, and they’re cheaper than the little 12-ounce ones. If you’re feeling fancy, Ghirardelli baking chips work too, but they’re pricier. The butter? Full-fat is a must—none of that reduced-fat nonsense. Room temperature is key, so take it out 30 minutes before you start. For the sugars, Domino brand is my go-to for brown sugar—it’s consistently packed and reliable. The vanilla extract? Nothing imitation here—if it says 'vanilla flavor' on the bottle, toss it.
No Nestlé morsels? Ghirardelli or Guittard chocolate chips are the closest substitutes. Running low on butter? European-style unsalted butter (like Plugrá) adds extra richness, but regular butter works fine. The baking powder is where you can cut corners—double-acting is ideal, but any brand will do. For the buttercream, vanilla bean paste gives that restaurant-quality depth, but good vanilla extract is a solid backup. The milk? Whole milk keeps things richer, but 2% works too—no need to splurge here. Short on powdered sugar? Confectioners’ sugar is the same thing, just check for lumps before using.
This cake keeps beautifully—3 days at room temperature wrapped in plastic, or 5 days refrigerated if you’re prepping ahead. The buttercream stays fresh for up to a week in the fridge, so make extra for sandwiches. For gifting, slice and wrap individual portions in parchment paper—they’ll stay fresh for 3-4 days at room temp. Freeze the whole cake for up to 3 months if you’re planning ahead. Just thaw overnight in the fridge before serving. Trust me, the leftovers are just as good as the first slice.
Why You'll Love This Recipe
- Here’s what sold me: that perfect balance of gooey brown sugar centers with crispy edges. The Toll House morsels add a caramelized crunch, and honestly? It’s the kind of texture that makes you pause mid-bite just to enjoy it.
- I’ll be real: this cake disappears fast, but the good news? It reheats beautifully. Pop a slice in the oven for 10 seconds, and it’s like it was just baked. Plus, the ingredients are cheap—you’re basically making gourmet dessert for next to nothing. Win-win.
Step-by-step instructions for Nestlé Toll House cookie cake
Here's how to create a decadent cookie cake with two layers of fudgy magic and creamy frosting.
Prepare the Cookie Cake Layers
Preheat your oven to 350°F and grease two 9-inch round cake pans or line them with parchment circles. In a large mixing bowl, cream together the 1.5 cups unsalted butter, 2 cups granulated sugar, and 0.5 cup packed brown sugar on medium speed until light and fluffy—about 3-4 minutes. This step is crucial because it incorporates air, which helps create that tender cookie cake texture.
Add the 3 whole large eggs, one at a time, beating well after each addition. Mix in the 2 tsp pure vanilla extract and 1 tbsp vanilla bean paste until fully combined. In a separate bowl, whisk together the 2.5 cups all-purpose flour, 1.5 tsp baking powder, and 0.5 tsp salt. Gradually add the dry ingredients to the wet mixture, mixing just until combined. Fold in the 2 cups Nestlé Toll House morsels by hand—don't overmix or you'll end up with tough cookies.
Bake the Layers Evenly
Divide the batter evenly between the prepared cake pans. Bake for 25-30 minutes or until a toothpick inserted into the center comes out with just a few moist crumbs—don't wait for it to be completely clean or the cake will be dry. The edges should be golden brown while the center remains slightly soft. Let the layers cool in the pans for 10 minutes before transferring them to a wire rack to cool completely.
Here's the thing—cookie cakes are forgiving, but don't skip the cooling step. If you frost them too soon, the buttercream will melt and you'll end up with a soggy mess. I like to let them cool for at least 1 hour before assembling to ensure clean slices later.
Make the Creamy Buttercream Frosting
In a large mixing bowl, beat the 1.5 cups unsalted butter (softened but not melted) on medium speed until smooth and creamy—about 2-3 minutes. Gradually add the 3 cups powdered sugar, mixing on low speed until combined. Increase the speed to medium and beat for another 2 minutes until light and fluffy. Add the 1 cup heavy cream, 2 tsp pure vanilla extract, and 1 tbsp vanilla bean paste, mixing until smooth and well incorporated.
This is where the magic happens—the buttercream should be thick enough to hold its shape but still pipeable. If it's too thick, add the 0.25 cup milk one tablespoon at a time until you reach the perfect consistency. Taste and adjust sweetness if needed—you can add more powdered sugar if desired, but the original recipe is perfectly balanced.
Assemble and Frost the Cookie Cake
Place one of the cooled cookie cake layers on a cake stand or plate. Spread a thin layer of buttercream over the top to help the second layer adhere. Place the second layer on top and gently press down. Now comes the fun part—frosting! Spread a thin crumb coat over the entire cake and refrigerate for 15 minutes to set. This helps prevent crumbs from getting into your final frosting layer.
After the crumb coat sets, apply the remaining buttercream, smoothing it with a spatula or bench scraper. For extra decoration, pipe rosettes or swirls around the edges using a piping bag fitted with a star tip. Chill the cake in the refrigerator for at least 1 hour before slicing—this ensures clean cuts and prevents the frosting from melting.
Pro Tips For Making Nestle Toll House Cookie Cake
- Cream Butter Properly: Use a stand mixer with the paddle attachment to beat the butter and sugars until it’s light and fluffy—about 3-4 minutes. I learned this the hard way: skipping this step means dense, cakey cookies instead of the tender, chewy texture you want. (Yes, even if you’re impatient like me.)
- Chill the Dough: Let the dough rest in the fridge for at least 30 minutes before baking. This isn’t just about convenience—it prevents the chocolate from melting too fast and keeps the cookies from spreading into flat pancakes. (Your future self will thank you.)
- Don’t Overmix the Dry Ingredients: Once you add the flour, mix just until combined—no need to overwork it. I used to think more mixing = better texture, but now I know it develops gluten and ruins the cookie’s softness. Stop when the flour disappears.
- Bake in Batches: This recipe makes a lot of dough, so split it into two pans and bake them one after the other. Crowding the oven leads to uneven baking—edges overdone while centers stay doughy. (And yes, it’s worth the extra 10 minutes.)
Dietary considerations for this nestle toll house cookie cake
Gluten-Free Adaptation
To make this cookie cake gluten-free, replace the 2.5 cups all-purpose flour with a 1:1 gluten-free baking flour blend like King Arthur Measure for Measure or Bob's Red Mill 1-to-1. These blends contain xanthan gum, which mimics gluten's structure for better texture.
I've tested this substitution and found that adding ½ tsp extra xanthan gum improves moisture retention—gluten-free batters tend to dry out faster. 🌾
Dairy-Free Options
For a dairy-free version, swap the 1.5 cups unsalted butter for 1.5 cups dairy-free butter (like Miyoko's or Earth Balance) and replace the heavy cream with 1 cup full-fat coconut cream (chilled overnight).
Use dairy-free vanilla extract and ensure your Nestlé morsels are dairy-free—check the package or opt for Enjoy Life chocolate chips. The texture stays rich, though slightly denser. 🥛
Lower-Sugar Swaps
Reduce the 2 cups granulated sugar to 1.5 cups and replace the remaining 0.5 cup with monk fruit sweetener (like Lakanto) for a 1:1 substitution. For the brown sugar, use ½ cup coconut sugar—it has a lower glycemic index.
The cake will still taste sweet but with fewer calories. I recommend using almond flour (mixed 50/50 with gluten-free flour) to further cut carbs while adding nuttiness. 🍚
Nut-Free Considerations
If nut allergies are a concern, avoid vanilla bean paste (which often contains almonds) and use pure vanilla extract instead. For extra flavor, add 1 tsp lemon zest or ½ tsp cinnamon to the batter.
The cookie cake remains delicious without nuts—just ensure all chocolate morsels are nut-free (like Enjoy Life brand). Always double-check labels, as cross-contamination is a risk. 🌸
Vegan Version
Transform this into a vegan cookie cake by replacing the eggs with 3 tbsp ground flaxseed + 9 tbsp water (let sit for 5 minutes to gel). Use vegan butter (like Miyoko's) and coconut oil for the buttercream.
For the chocolate morsels, opt for vegan chocolate chips (such as Pascha or Enjoy Life). The texture will be slightly denser but just as flavorful—perfect for plant-based bakers. 🌱
Keto-Friendly Tweaks
For a keto-friendly adaptation, replace the flour with 1.5 cups almond flour and 1 cup coconut flour (the latter absorbs moisture, so reduce milk to 2 tbsp). Use 1 cup granulated erythritol or monk fruit sweetener instead of sugar.
The Nestlé morsels can stay, but ensure they're sugar-free (like Lily's brand**). Expect a denser, cookie-like texture—ideal for those avoiding carbs. 💪
Nutrition facts
Frequently asked questions about Toll House cookie cake
Can I make this cookie cake in a single layer instead of two?
For a single-layer version, use just one 9-inch cake pan and reduce the batter by half. Bake for 20-25 minutes at 350°F until a toothpick comes out clean. This works well for smaller gatherings or when you prefer a thicker slice. The texture will be slightly denser but still packed with that classic Toll House flavor.
Why did my cookie cake turn out too dry?
Overbaking is the most common cause—remove your cake when a toothpick has just a few moist crumbs, not when it's completely clean. Another culprit could be overmixing the batter, which develops gluten and makes the cake tough. Also, ensure you're using the correct amount of butter (don't substitute with margarine) and that your oven isn't running hot. A cake thermometer helps!
How do I store leftovers to keep them fresh?
Wrap the cake tightly in plastic wrap or aluminum foil and store at room temperature for up to 3 days. For longer storage, refrigerate for up to 5 days—just let it sit at room temperature for 30 minutes before serving to soften the frosting. The buttercream stays fresh for 1 week in the fridge if properly sealed. Freezing isn't recommended as it can make the texture crumbly.
Can I add walnuts or other mix-ins to this recipe?
While traditional Toll House cookies include nuts, this cake recipe is designed to highlight the chocolate morsels for maximum flavor impact. If you want to add nuts, try ½ cup chopped walnuts or pecans—fold them in gently after mixing the dry ingredients. For other mix-ins, consider ½ cup dried cranberries or ½ cup white chocolate chips for variation, but don't exceed 1 cup total of additional mix-ins to maintain balance.
What's the best way to serve this cookie cake?
Warm slices pair beautifully with a scoop of vanilla ice cream or a dollop of whipped cream. For a fancy touch, dust with powdered sugar or drizzle with melted chocolate. Serve at room temperature for the best texture contrast between the crisp edges and soft center. This cake is perfect for birthdays, holiday gatherings, or as a comforting dessert after dinner.