Desserts
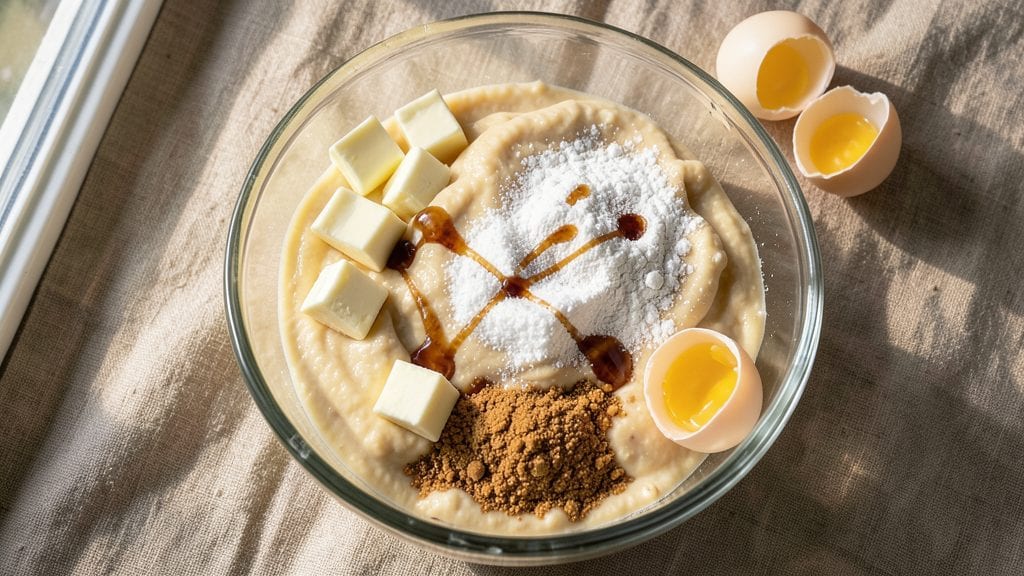
This small batch Toll House cookie recipe delivers the perfect balance of chewy centers and toasted pecan crowns—just 12 cookies at a time. The secret lies in precise measurements and a chilled dough that develops rich flavor while maintaining that signature texture.
I’ve baked these for holiday gatherings and family dinners alike, and they never disappoint.
What makes this recipe special is its simplicity and control—no overmixing, no guesswork, just a foolproof method that yields cookies with crisp edges and a tender, caramelized center. The addition of high-quality chocolate chips and toasted pecans elevates every bite, making these cookies taste like they came from a bakery.
Ready in just 12 minutes per batch, they’re perfect for satisfying cravings without committing to a full sheet pan.
The result is a batch of cookies that’s impossible to resist—golden brown, fragrant with vanilla, and topped with crunchy pecans that add a satisfying contrast. These cookies stay fresh for days, making them ideal for meal prep or gifting.
Whether you’re hosting or treating yourself, this recipe delivers restaurant-quality results with minimal effort.
For those who love to experiment, try swapping in white chocolate or adding a pinch of sea salt for extra depth. The dough can be chilled for up to 48 hours, so you can prep ahead and bake at your convenience. Let’s get started on these classic cookies!
Ingredients for small batch toll house cookie
Twelve perfect cookies start with these simple, quality ingredients—no shortcuts needed.
| Ingredient | Amount | Notes |
|---|---|---|
| Unsalted Butter 🧈 | ½ cup | Cold, cubed for even baking |
| Granulated Sugar 🍚 | ½ cup | Packed lightly for sweetness |
| Light Brown Sugar 🍚 | ¼ cup | Packed, for chewy texture |
| Large Eggs 🥚 | 1 whole | Room temperature for blending |
| Pure Vanilla Extract 🍯 | 1 tsp | High-quality for flavor |
| All-Purpose Flour 🌾 | 1 cup | Sifted for light texture |
| Baking Soda 🧂 | ¼ tsp | Ensures proper rise |
| Salt 🧂 | ½ tsp | Fine sea salt preferred |
| Semisweet Chocolate Chips 🍫 | 1 cup | High-quality for melty centers |
| Raw Pecans 🥜 | ½ cup | Toasted and chopped |
| Extra-Virgin Olive Oil 🫒 | 1 tbsp | For toasted pecan coating |
The butter makes all the difference here. European-style butter from Plugrá or Land O’Lakes gives the best flavor, but any good brand works. Keep it cold—cubed and chilled until ready to use. The pecans? Trader Joe’s or Costco have the best prices for raw pecans. Toast them in a dry pan for 5-7 minutes until fragrant, then toss with olive oil and salt before chopping. That’s what gives those cookies their signature crunch. For the chocolate chips, Ghirardelli or Nestlé Toll House are my go-tos—they melt perfectly without getting grainy.
No vanilla extract? Vanilla bean paste or even a pinch of ground vanilla bean works in a pinch. Short on pecans? Toasted walnuts or almonds are solid swaps, though they change the flavor slightly. The brown sugar needs to be packed—use a spoon to press it down lightly in the measuring cup. For the chocolate chips, if you’ve got white chocolate, swap half the semisweet for white—just know the texture will be slightly different. And if you’re feeling fancy, add a pinch of flaky sea salt to the dough for a gourmet touch. The olive oil isn’t just for the pecans—it keeps them from burning during toasting.
Chill the dough for at least 1 hour—up to 48 hours if you’re prepping ahead. Store it in an airtight container with parchment between layers. Once baked, these cookies stay fresh for 5-6 days at room temperature, wrapped in foil. For longer storage, freeze the dough balls (before baking) for up to 3 months. Bake straight from frozen—just add a minute to the cook time. And if you’re gifting? Package them in clear cellophane with a ribbon for a bakery-style touch.
Why You'll Love This Recipe
- No Mixer Needed: I swear by this recipe when my mixer’s on vacation—just cream the butter and sugars by hand until it’s fluffy. The eggs and vanilla blend right in without a fuss, and the dough comes together faster than you can say "chocolate chips."
- Chewy-Crisp Magic: That perfect balance? It’s all in the butter-to-sugar ratio and a quick chill. The brown sugar keeps them soft inside while the edges stay just crisp enough—like biting into a warm hug, but with more chocolate.
- Weeknight Hero: Between us, these are my go-to for when I’m too tired to bake a whole sheet. A small batch means I can pop them in the oven while I fold laundry, and they’re done before the kids demand snacks.
- Leftovers? More Like Leftovers: Honestly, I’ve never had a batch last past the second day. But when they do? I freeze the extras—no weird texture, just the same rich flavor straight from the freezer. (Yes, even on a Tuesday night.)
Step-by-step instructions for small batch Toll House cookies
Here's how to make these perfect cookies with crispy edges, chewy centers, and nutty pecan crowns.
Cream the Butter and Sugars Together
In a medium mixing bowl, combine the 0.5 cup unsalted butter (cold and cubed) with the 0.5 cup granulated sugar and 0.25 cup light brown sugar. Using a hand mixer or stand mixer on medium speed, beat everything together for 3-4 minutes until the mixture is light and fluffy. You'll see the color change from pale yellow to a lighter hue, and the texture will nearly double in volume.
This creaming process is what creates those signature crackly tops and helps the cookies maintain their perfect shape. If you're using a hand mixer, make sure to scrape down the sides of the bowl every 30 seconds to ensure even mixing. The butter should be completely smooth with no visible lumps by the end.
Add Egg and Vanilla, Then Dry Ingredients
Add the 1 whole large egg (room temperature) and 1 teaspoon pure vanilla extract to the butter-sugar mixture. Beat on low speed for 30 seconds until fully combined. Then, in a separate bowl, whisk together the 1 cup all-purpose flour, 0.25 teaspoon baking soda, and 0.5 teaspoon salt. Gradually add the dry ingredients to the wet mixture, mixing on low speed just until combined.
You don't want to overmix here—just until the flour is mostly incorporated and you see a few small streaks remaining. Overmixing develops gluten, which can make your cookies tougher. Once combined, remove the bowl from the mixer and fold in the 1 cup semisweet chocolate chips using a spatula, making sure they're evenly distributed throughout the dough.
Prepare the Pecans for the Crowns
While you're working with the dough, toast the 0.5 cup raw pecans in a dry skillet over medium heat for 3-4 minutes, stirring constantly, until they're lightly golden and fragrant. Remove from heat and let them cool for 1 minute, then transfer to a cutting board and roughly chop them with a knife.
Next, drizzle the 1 tablespoon extra-virgin olive oil over the toasted pecans and toss to coat evenly. This will help them stick to the tops of your cookies when you press them down. Set aside until ready to use—you'll want to work quickly so the pecans stay warm and crispy.
Chill the Dough for Better Texture
Cover the mixing bowl with plastic wrap and refrigerate the dough for at least 30 minutes, but ideally 1 hour. Chilling is crucial for two reasons: it firms up the butter so the cookies hold their shape better, and it allows the flour to fully hydrate for a perfect texture. If you're short on time, you can even pop the dough in the freezer for 15 minutes—just make sure it's cold before you start baking.
While the dough chills, preheat your oven to 350°F and line two baking sheets with parchment paper. The dough will be easier to handle when cold, and you'll get more even baking results. Don't skip this step—it makes all the difference in the final texture of your cookies.
Bake to Golden Perfection with Pecan Crowns
Using a cookie scoop or tablespoon, drop the chilled dough onto the prepared baking sheets, spacing the cookies about 2 inches apart (they'll spread slightly). Gently press a few chopped pecans onto the top of each cookie to create those classic pecan crowns. Bake in the preheated oven for 10-12 minutes, until the edges are golden brown but the centers still look slightly soft.
Here's the thing—you want the cookies to look done on the outside but still have a little give in the middle. They'll continue cooking for a minute or two after you remove them from the oven. Let them cool on the baking sheet for 5 minutes before transferring to a wire rack to finish cooling. The result? Crispy edges, chewy centers, and those beautiful toasted pecan crowns on top.
Pro Tips For Making Small Batch Toll House Cookie
- CREAM THE BUTTER SLOWLY: Dump the butter in chunks, not melted—it’s the only way to trap air properly. I used to melt it first, and my cookies turned out dense and flat. Let the mixer do the work; resist the urge to rush this step, even if you’re impatient.
- USE COLD EGGS: Pull the eggs straight from the fridge and let them sit for 10 minutes before cracking them. Cold eggs incorporate better into the butter-sugar mix, giving you that signature chewy texture. (Yes, even if you’re in a hurry.)
- MEASURE BROWN SUGAR RIGHT: Pack the light brown sugar firmly into the measuring cup—don’t scoop and level. Too much air means overly crisp edges, and not enough means a bland center. A quick tap on the counter ensures consistency every time.
- BAKE UNTIL GOLDEN, NOT DONE: Pull them out when the edges are just starting to turn golden, not when they look fully set. Toll House cookies keep baking on the sheet—overbaking turns them dry. If you’re unsure, cut one open; it should be soft but not wet.
Pro cooking tips for great small batch toll house cookie
Butter Temperature Matters
The key to perfect Toll House cookies starts with cold butter—never softened or melted. Cube your ½ cup unsalted butter and keep it chilled until ready to use. Cold butter creates air pockets during creaming, giving those signature crackly tops.
I like to use Plugrá European-style butter for its rich flavor, but any good brand works. If your kitchen gets warm, pop the butter in the freezer for 10 minutes before cubing to ensure it stays firm. 🧈
Creaming Like a Pro
Cream the butter and sugars on medium speed for 3-4 minutes until the mixture is light and fluffy. You’ll know it’s ready when the color changes from pale yellow to a lighter hue and nearly doubles in volume.
Scrape down the sides of the bowl every 30 seconds to ensure even mixing—this prevents lumps and guarantees a smooth texture. If you’re using a hand mixer, take your time; rushing leads to uneven cookies. 💫
Chill the Dough
Never skip chilling the dough—it’s non-negotiable for texture. Cover the bowl with plastic wrap and refrigerate for at least 1 hour (up to 48 hours). Chilling firms up the butter, preventing excessive spreading, and lets the flour hydrate fully for a perfect chewy center.
For a quick fix, freeze the dough for 15 minutes before scooping. Pro tip: Use a cookie scoop for evenly sized cookies—this ensures consistent baking. ❄️
Pecan Prep Secrets
Toast the pecans in a dry skillet over medium heat for 3-4 minutes until fragrant and lightly golden. Immediately drizzle with 1 tablespoon olive oil and toss to coat—this helps them stick to the cookie tops.
Chop them roughly for a rustic look. If you’re in a hurry, use pre-toasted pecans from the store, but fresh toasted ones taste infinitely better. 🥜
Bake Time Precision
Bake at 350°F for 10-12 minutes until the edges are golden but the centers still look slightly soft. Overbaking dries out the cookies—remove them when they’re just set. Let them cool on the baking sheet for 5 minutes before transferring to a wire rack.
This resting time prevents cracking and ensures those chewy centers set properly. 🔥
Equipment Upgrades
Invest in a cookie scoop (like the OXO Good Grips) for perfect-sized cookies every time. A stand mixer with a paddle attachment makes creaming easier, but a hand mixer works fine. For even baking, use parchment-lined baking sheets—they prevent sticking and ensure crispy bottoms.
And if you’re serious about baking, a digital oven thermometer (like Thermoworks) ensures your oven is at the right temp. 💡
Nutrition facts
Frequently asked questions
Why do your small batch cookies need to chill?
Chilling the dough for at least 1 hour prevents excessive spreading and develops deeper flavor. The cold butter firms up, helping cookies maintain their shape while creating that perfect chewy center. You can even chill the dough overnight for maximum flavor development!
Can I substitute white chocolate for the semisweet chips?
Swap half the semisweet chips for white chocolate chips for a sweeter variation. The texture will be slightly softer, but the flavor contrast is delicious. For extra decadence, add a pinch of flaky sea salt to the dough.
What if my cookies spread too much during baking?
This usually means the butter wasn't cold enough or the dough wasn't chilled long enough. For next time, ensure your butter is cold and cubed, and chill the dough for the full 1 hour. Also, use a cookie scoop for even-sized portions. Overcrowding the baking sheet can also cause spreading.
How do I store these cookies for maximum freshness?
Keep them in an airtight container at room temperature for up to 5-6 days. For longer storage, freeze the dough balls (before baking) for up to 3 months. Bake straight from frozen—just add 1-2 minutes to the cook time. The fresh-from-oven flavor is unbeatable!
Can I make these cookies without nuts?
Yes! Simply omit the pecans and press a few extra chocolate chips into the tops instead. For a different flavor, try crushed pretzels or a sprinkle of cinnamon sugar. The classic Toll House flavor still shines through without nuts.