Beverages
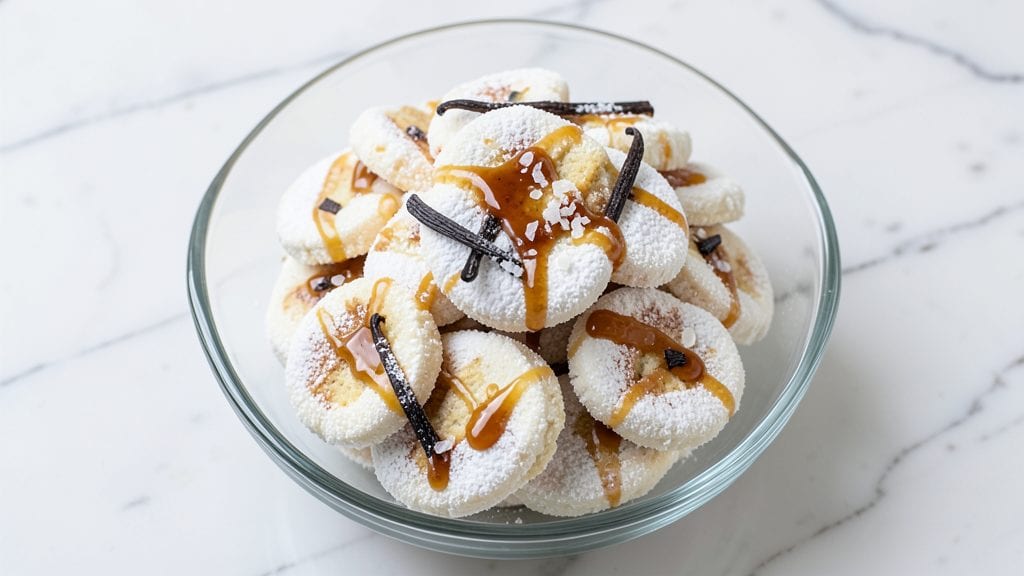
This condensed milk snow cookies recipe delivers the perfect balance of light, airy texture and rich, buttery flavor—each bite is a fluffy vanilla swirl with toasted coconut crunch. The secret lies in folding whipped cream and condensed milk into the batter, creating that signature melt-in-your-mouth consistency.
I’ve perfected this recipe over years of baking, and it’s become a holiday favorite that disappears faster than you can say "snowflake."
The process is simpler than it sounds, with just a handful of ingredients that work together to create these delicate cookies. You’ll need all-purpose flour, butter, sugar, eggs, and of course, condensed milk and toasted coconut for that signature crunch.
The key is patience—whipping the cream and folding it gently into the dough ensures those signature air pockets that make these cookies so irresistibly light.
What you’ll end up with is a tray of golden, fluffy cookies with a tender crumb and pockets of sweet, creamy filling. The toasted coconut adds a delightful contrast, giving each bite a satisfying crunch.
These cookies are perfect for holiday gatherings, gift-giving, or simply treating yourself to something special. They’re foolproof, delicious, and guaranteed to impress.
Once baked, let them cool slightly before serving—though they’re hard to resist fresh out of the oven. Store in an airtight container, and they’ll stay fresh for days, though I doubt they’ll last that long. Let’s get baking!
Ingredients for condensed milk snow cookies
Just eleven ingredients create these magical buttery vanilla swirls with coconut crunch.
| Ingredient | Amount | Notes |
|---|---|---|
| All-Purpose Flour 🌾 | 2 ½ cups | Sifted for light texture |
| Unsalted Butter 🧈 | 1 cup | Cold, cubed for cutting |
| Granulated Sugar 🍚 | ¾ cup | Superfine preferred for smoothness |
| Sweetened Condensed Milk 🥛 | 1 can | 14 oz can (not low-fat) |
| Large Eggs 🥚 | 2 whole | Room temperature for blending |
| Vanilla Extract 🍯 | 1 tsp | Pure vanilla preferred |
| Heavy Whipping Cream 🥛 | 1 cup | Cold, whipped to stiff peaks |
| Toasted Coconut Flakes 🥥 | 1 cup | Lightly toasted in dry pan |
| Baking Powder 🍞 | 1 tsp | Aluminum-free for tender cookies |
| Salt 🧂 | ½ tsp | Fine sea salt preferred |
| Powdered Sugar 🍚 | ¼ cup | For dusting finished cookies |
The condensed milk is non-negotiable—Eagle Brand or Carnation are the gold standards, and never use low-fat. Grab a can from the baking aisle, not the coffee creamer section. For the coconut, unsweetened flakes toasted in a dry pan for 3-4 minutes (stirring constantly) add that perfect crunch. I always buy the Trader Joe's brand because it's cheaper and toasts up beautifully. The butter? Plugrá or Land O'Lakes unsalted—never salted, and always cold when cutting into the flour. Room-temperature eggs blend smoother, so take them out 30 minutes before baking.
No vanilla extract? Vanilla bean paste works too, or scrape seeds from a split pod. Short on coconut? Toasted pecans or chopped almonds give a similar crunch, though the flavor changes. The baking powder must be fresh—if it's over a year old, test it in a small bowl with water. If it fizzes, you're good; if not, toss it. For the powdered sugar, Domino or C&H brands are fine, but if you've got confectioners' sugar with cornstarch, that's even better for dusting. The whipped cream needs to be cold and heavy, so chill your bowl and beaters beforehand. Don't overmix the dough—just until combined.
These keep for 5 days in an airtight container, but honestly? They vanish faster. For gifting, wrap individually in parchment and tie with ribbon—they stay fresh for 3 days at room temp. Freeze extras for up to 3 months—just thaw at room temp before serving. The powdered sugar dusting? Do it right before serving, or it'll melt into the cookies. Store the toasted coconut separately if you're prepping ahead—it stays crunchy longer that way.
Why You'll Love This Recipe
- No Mixer Needed: I swear by this dough—just fold, chill, roll. No standing at the counter kneading like a mad scientist. The butter stays cold, the condensed milk keeps things tender, and you’re done in 10 minutes flat.
- Caramelized Magic: That crispy, buttery edge with a soft, almost marshmallowy center? The condensed milk does all the work—it caramelizes just enough to give these cookies a grown-up depth, but they’re still sweet enough to fool kids.
- Party in a Box: Freeze the dough for months, pull it out for holidays, or use it as a last-minute dessert. They’re sturdy enough to ship (yes, I’ve done it) and taste fresh no matter when you bake them.
- Pantry Staple Hack: You’re already using flour, sugar, and butter—add condensed milk and eggs, and boom. No specialty ingredients, no extra shopping trips. My go-to when I’ve got a sugar craving but zero energy to impress.
Step-by-step instructions for condensed milk snow cookies
Here's how to create these dreamy, buttery vanilla swirls with a toasted coconut crunch—simple steps for perfect results every time.
Prepare the Cookie Dough Base
In a large mixing bowl, combine the 2.5 cups all-purpose flour, 1 tsp baking powder, and 0.5 tsp salt. Sift this mixture together to remove any lumps and create a light, airy base for your cookies. In a separate bowl, beat the 1 cup unsalted butter and 0.75 cup granulated sugar together until smooth and fluffy—about 2-3 minutes using an electric mixer.
Add the 2 whole large eggs, one at a time, mixing well after each addition. Then stir in the 1 tsp vanilla extract and the 1 can sweetened condensed milk. The mixture should be thick but still workable. If it feels too stiff, add 1 tablespoon of heavy whipping cream to help bind everything together. This dough will be slightly different from traditional cookie dough because of the condensed milk, but trust the process—it creates that signature melt-in-your-mouth texture.
Whip the Cream and Create the Swirl
In a separate, chilled bowl, whip the 1 cup heavy whipping cream to stiff peaks. This should take about 3-4 minutes with an electric mixer. The cream should hold its shape when you lift the beaters—if it's too soft, whip it a bit longer. Fold half of the whipped cream into the cookie dough using a spatula, mixing just until combined. This keeps the dough light and adds that signature swirl effect.
Now, here's where the magic happens: fold in half of the 1 cup toasted coconut flakes into the dough. Set aside the remaining dough and whipped cream for the final assembly. The coconut adds a delightful crunch that contrasts beautifully with the soft, buttery cookie. Save the other half of the coconut for the top layer—this ensures every bite has that perfect texture combination.
Shape and Layer the Cookies
Preheat your oven to 350°F and line two baking sheets with parchment paper. Using a cookie scoop or tablespoon, divide the dough into 16 equal portions (about 1.5 tablespoons each). Roll each portion into a ball and place it on the prepared baking sheets, spacing them about 2 inches apart. Flatten each ball slightly with your palm to create a ½-inch thick disk.
Take 1 tablespoon of the reserved whipped cream and place it in the center of each flattened dough disk. Then, gently press the remaining dough around the cream to seal it inside, creating a swirl effect. Sprinkle the remaining ½ cup toasted coconut flakes evenly over the tops of the cookies. This step is what gives these cookies their signature look and texture—don’t skip it! Bake for 12-15 minutes until the edges are golden brown and the tops look slightly puffed.
Finish and Dust for Perfection
Once the cookies are baked, remove them from the oven and let them cool on the baking sheets for 5 minutes. This brief resting period helps them set slightly before transferring. While they're still warm, dust the tops generously with the 0.25 cup powdered sugar using a fine-mesh sieve. The sugar will melt slightly from the heat, creating a beautiful, snowy finish that's both decorative and delicious.
Let the cookies cool completely on a wire rack before serving. The contrast of the warm, buttery cookie with the cool, sweet powdered sugar topping is what makes these cookies truly special. Store any leftovers in an airtight container for up to 5 days, though I doubt they'll last that long—they're far too tempting! These cookies are perfect for holidays, potlucks, or just treating yourself to something truly indulgent.
Pro Tips For Making Condensed Milk Snow Cookies
- CHILL THE DOUGH: I learned this the hard way—rolling out warm condensed milk dough is a disaster. Let the dough rest in the fridge for at least 30 minutes before shaping. The condensed milk thickens as it cools, making it easier to handle and preventing those frustrating cracks when cutting.
- WEIGH THE CONDENSED MILK: That can of condensed milk? It’s not always 14 oz. Weigh it before measuring—some brands run lighter. If you’re short, balance it with a splash of heavy cream (just 1-2 tablespoons) to keep the texture light. Trust me, your cookies will thank you.
- DON’T OVERMIX THE BUTTER: The butter in this dough is your friend, but don’t turn it into a fight. Mix it in until it’s pea-sized and just combined—no streaks, no paste. Overworking it develops gluten, and suddenly you’ve got chewy cookies instead of melt-in-your-mouth snowflakes.
- BAKE IN BATCHES: Crowding the pan is how you get soggy bottoms. Space your cookies 2 inches apart on the tray, and resist the urge to double-stack. If your oven runs hot, rotate the pan halfway through—these cookies go from perfect to burned faster than you think.
Troubleshooting perfect results
Dough Too Stiff?
If your dough feels too thick to handle, don’t panic—just add 1 tablespoon of cold heavy whipping cream at a time until it becomes pliable. The condensed milk can make the dough denser than usual, so this adjustment keeps it workable.
I’ve found that Land O’Lakes heavy cream works best here, as it whips stiffer than some store brands. Mix gently to avoid deflating the whipped cream you’ll fold in later. 🥛
Cookies Spreading Too Much
Over-spreading is often caused by overmixing the dough or using too much sugar. To fix this, chill the dough for 30 minutes before shaping—this firms it up. Also, ensure your oven is fully preheated to 350°F and use a light-colored baking sheet (dark pans absorb heat and cause spreading).
If they still spread too much, reduce baking time by 1-2 minutes.
Cream Not Holding Peaks
If your whipped cream collapses when folded into the dough, it’s likely not cold enough or whipped long enough. Chill your mixing bowl and beaters in the freezer for 10 minutes before whipping.
Use cold heavy cream straight from the fridge and whip to stiff peaks—when you lift the beaters, the cream should hold a firm point. If it’s too warm, try adding 1 ice cube to the bowl while whipping. 🥶
Coconut Losing Crunch
Toasted coconut can get soggy if baked too long or if the cookies cool too slowly. To prevent this, bake at 350°F for only 12-15 minutes—they’re done when edges are golden but centers are still soft.
Let cookies cool completely on a wire rack (not on the baking sheet) to preserve the crunch. Store coconut separately if prepping ahead, and add it right before baking.
Cookies Tasting Bland
If your cookies lack flavor, double-check your vanilla extract—use pure vanilla extract (not imitation) or scrape seeds from a vanilla bean for deeper flavor. The condensed milk should be full-fat (like Eagle Brand), not low-fat.
For extra richness, add ½ teaspoon of almond extract to the dough. A pinch of cinnamon or cardamom can also elevate the flavor without overpowering. 💛
Powdered Sugar Melting
If the powdered sugar dusting clumps or melts into the cookies, it’s likely because the cookies cooled too slowly or the sugar was applied too early. Dust the sugar immediately after removing cookies from the oven while they’re still warm but not dripping.
Use a fine-mesh sieve for even coverage, and let them cool completely on a rack before storing. For extra shine, dust again right before serving.
Nutrition facts
Frequently asked questions
Can I make these without toasted coconut?
Swap the toasted coconut for chopped pecans, almonds, or even crushed pistachios for a different crunch. If you prefer a nut-free option, try crushed graham crackers or vanilla wafer bits—they add texture without coconut. Just toast them lightly in a dry pan first for best results.
Why do my cookies taste too sweet?
The condensed milk already adds richness, so reduce the granulated sugar to ½ cup instead of ¾ cup. For a less sweet version, replace ½ cup of the powdered sugar dusting with cornstarch—it adds shine without extra sweetness. Balance is key: the coconut and vanilla should shine through.
Can I bake these in a convection oven?
Yes, but reduce the temperature to 325°F and bake for 10-12 minutes instead of 12-15. Convection ovens cook faster, so watch closely—they’ll brown quicker. If your cookies puff too much, flatten them slightly before baking. Always use the convection setting label on your oven.
How do I store them for gifting?
Wrap each cookie individually in parchment paper, then place in an airtight container with a silica gel packet to absorb moisture. For extra protection, add a parchment divider layer between stacks. They’ll stay fresh for 3 days at room temperature or 1 week refrigerated. Include a note: "Best enjoyed within 24 hours!"
Can I substitute evaporated milk for condensed milk?
No—evaporated milk won’t give the same rich, creamy texture. Condensed milk is thicker and sweeter (about 28% sugar), which is essential for the signature melt-in-your-mouth quality. If you’re out of condensed milk, mix ½ cup powdered sugar with ½ cup whole milk as a last resort, but the flavor won’t be identical.