Desserts
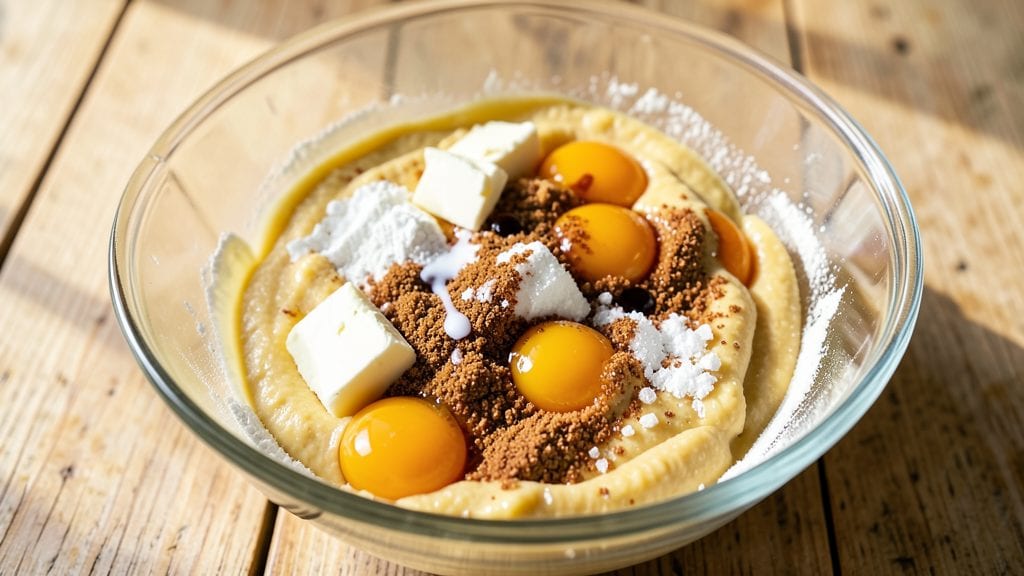
This vintage cookie recipe brings back the golden age of homemade baking with its perfect balance of warm spices and buttery vanilla. The secret lies in a precise blend of flour, sugar, and spices that creates that signature crunch while maintaining tender centers—just like the cookies your grandmother made.
I’ve perfected this recipe over years of baking, ensuring every batch delivers that nostalgic flavor and texture that transports you back in time.
The dough is simple yet transformative: rolled thin, cut into classic shapes, and baked until the edges are golden and the scent fills your kitchen.
What makes these cookies truly special is the chilling step—letting the dough rest in the fridge for at least an hour develops deeper flavor and prevents spreading.
This is a foolproof method that even beginner bakers can master, yielding cookies that are crisp around the edges and soft in the middle.
Once out of the oven, the aroma of cinnamon, nutmeg, and vanilla will have everyone gathering around. These cookies are rich enough to stand alone but pair beautifully with a simple vanilla glaze or a dusting of powdered sugar.
The buttery flavor lingers with every bite, making them perfect for holiday gatherings, potlucks, or just a cozy treat on a quiet afternoon.
For added versatility, you can mix in chopped nuts or dried fruit for extra texture, or roll half the dough in sprinkles before baking for a festive touch. The recipe scales easily, so you can bake a single batch for a small gathering or double it for a crowd.
Let’s bring back the magic of vintage baking—one perfect cookie at a time.
Ingredients for vintage cookie
Buttery, spiced, and nostalgic—these cookies bring back the golden age of homemade baking.
| Ingredient | Amount | Notes |
|---|---|---|
| All-Purpose Flour 🌾 | 2 ½ cups | Sifted for light texture |
| Unsalted Butter 🧈 | 1 cup | Cold, cubed for cutting |
| Granulated Sugar 🍚 | 1 cup | White sugar preferred |
| Brown Sugar 🍚 | ½ cup | Packed firmly |
| Large Eggs 🥚 | 2 whole | Room temperature |
| Pure Vanilla Extract 🍯 | 2 tsp | High-quality preferred |
| Ground Cinnamon 🌿 | 1 ½ tsp | Freshly ground ideal |
| Ground Nutmeg 🌿 | ½ tsp | Freshly grated nutmeg |
| Ground Cloves 🌶️ | ¼ tsp | Lightly toasted |
| Salt 🧂 | ½ tsp | Fine sea salt |
| Baking Soda 🧪 | ½ tsp | Freshly measured |
| Vanilla Bean Paste 🍯 | 1 tsp | For extra vanilla flavor |
| Powdered Sugar 🍚 | ½ cup | For dusting (optional) |
The butter is non-negotiable here—use European-style butter if you can find it, like Plugrá or Bergère. It has higher fat content, which gives those cookies that signature melt-in-your-mouth texture. For the spices, Penzeys Spices or bulk bins at natural grocery stores are your best bet—they stay fresher longer. The vanilla extract? Hauslab or Nielsen-Massey are worth the splurge for that authentic vintage flavor. If you're feeling fancy, grab a vanilla bean and scrape out the seeds for extra depth—trust me, it makes all the difference. Sift that flour, too—it keeps the cookies light and airy, just like Grandma’s.
No vanilla bean paste? Double the vanilla extract—it’ll still taste amazing. Running low on brown sugar? Lightly pack granulated sugar into the measuring cup for a similar effect. Want to add a festive touch? Roll half the dough in sprinkles before baking, or fold in chopped walnuts for extra crunch. The dough needs to chill for at least an hour, but if you’re in a rush, pop it in the freezer for 20 minutes. Just don’t skip this step—it’s what keeps those cookies from spreading into sad, flat pancakes. And if you’re feeling extra, a pinch of cardamom adds a warm, floral note that pairs perfectly with the spices.
These cookies taste even better the next day—store them in an airtight container at room temperature for up to 5 days. For a longer shelf life, freeze the dough balls before baking and pop them straight into the oven when you’re ready. Wax paper between layers keeps them from sticking if you’re stacking them. And if you’re planning ahead for holiday gatherings? Double the batch—they disappear fast. The aroma alone will have everyone rushing to the kitchen, so save some for last-minute guests.
Why You'll Love This Recipe
- No-Fuss Mixing: I swear by the creamy butter-and-sugar combo here—just cream, dump, fold. No food processor, no fancy techniques, just a sturdy spoon and a bowl. The brown sugar’s stickiness does the work for you, so even if you skip the mixer, the dough comes together like it’s been kneaded for hours.
- Buttery Caramel Crunch: That perfect balance of granulated and brown sugar? It’s what makes these cookies sing—chewy centers with a crispy edge that cracks just enough to reveal molten caramel goodness. Honestly, the first bite always makes me pause mid-sentence.
- Holiday or Tuesday: I’ve made these for Christmas cookie swaps and, yes, even on a Tuesday night when I needed something fast. They freeze beautifully (just thaw before baking) and taste just as good reheated as they do fresh. My kids don’t care if it’s a special occasion—these disappear either way.
- Pantry Staples Only: Between us, this recipe uses ingredients you’re already buying. Butter, sugar, flour, eggs—no weird substitutes or hard-to-find spices. And because they keep for days in an airtight tin, you’ll actually eat them before they go stale. (No sad, rock-hard cookies here.)
Step-by-step instructions for vintage cookie recipe
This classic cookie recipe delivers that nostalgic, warm spiced crunch with a buttery vanilla kiss—every bite transports you back to grandma's kitchen.
Cream Butter and Sugars Together
In a large mixing bowl, combine the 1 cup unsalted butter (cold, cubed), 1 cup granulated sugar, and 0.5 cup packed brown sugar. Using an electric mixer on medium speed, beat everything together for 3-4 minutes until the mixture becomes light and fluffy. You'll notice the butter pieces begin to disappear and the sugar transforms into a pale, airy consistency.
This creaming process is absolutely critical—it incorporates air into the dough, which creates that signature tender crumb and crackly top. I like to scrape down the sides of the bowl every minute or so to make sure everything gets properly incorporated. If you're mixing by hand, this will take a bit more elbow grease, but the same principle applies.
Add Eggs and Vanilla for Rich Flavor
Once the butter-sugar mixture is light and fluffy, add the 2 whole large eggs (room temperature) one at a time, mixing well after each addition. Then stir in the 2 teaspoons pure vanilla extract and 1 teaspoon vanilla bean paste. The paste will add that extra depth of vanilla flavor that makes these cookies truly special.
At this stage, the mixture should be smooth and slightly thicker. If it looks too stiff, don't worry—it will come together beautifully when we add the dry ingredients. I always use room temperature eggs because they blend more smoothly into the mixture, creating a more uniform texture in the final cookies.
Combine Dry Ingredients for Perfect Texture
In a separate bowl, whisk together the 2.5 cups all-purpose flour, 1.5 teaspoons ground cinnamon, 0.5 teaspoon ground nutmeg, 0.25 teaspoon ground cloves, 0.5 teaspoon salt, and 0.5 teaspoon baking soda. This spice blend gives these cookies their signature warm, aromatic flavor that's so reminiscent of vintage recipes.
Gradually add the dry ingredients to the wet mixture, mixing on low speed just until combined. Be careful not to overmix—you want to see a few flour streaks remaining. The goal is to create a soft, dough-like consistency that holds together when you press it. If the dough seems too dry, you can add an extra tablespoon of milk (though our recipe doesn't call for it).
Chill the Dough for Better Cookies
Once the dough comes together, divide it into two equal portions and flatten each into a disk about 1 inch thick. Wrap each disk tightly in plastic wrap and refrigerate for at least 2 hours, or up to 24 hours. This chilling step is absolutely essential—it prevents the cookies from spreading too much in the oven and helps develop that perfect texture.
I know it's tempting to skip this step, especially if you're eager to bake, but trust me—chilling makes all the difference. The cold dough will result in thicker, more flavorful cookies with that classic vintage crunch. While the dough chills, you can preheat your oven to 350°F and prepare your baking sheets with parchment paper.
Bake to Golden Perfection
Remove the dough from the refrigerator and let it sit at room temperature for 10-15 minutes before rolling. Preheat your oven to 350°F and line two baking sheets with parchment paper. Using a cookie scoop or tablespoon, drop 1-tablespoon portions of dough onto the prepared sheets, spacing them about 2 inches apart—they'll spread as they bake.
Bake for 10-12 minutes until the edges are golden brown and the centers look just slightly underdone. The cookies should be soft in the middle with a crisp edge—this is what gives them that perfect texture. Let them cool on the baking sheet for 5 minutes before transferring to a wire rack to cool completely. While they're still warm, dust the tops with the 0.5 cup powdered sugar for that classic vintage finish.
Pro Tips For Making Vintage Cookie
- Cream Butter Cold: Take that butter straight from the fridge—no softening, no room-temperature nonsense. Vintage cookies rely on that fat staying firm enough to hold their shape, and once you’ve mixed in the sugars, the dough should still look like it’s fighting you a little. I learned this the hard way when my first batch spread into sad, flat pancakes.
- Measure Sugar Right: Pack that brown sugar. Yes, even if the recipe says "lightly packed," give it a firm press into the measuring cup—it’s the difference between chewy and crumbly. Granulated sugar? Spoon it in, don’t scoop, or you’ll end up with cookies that taste like they’re missing something. Trust me, your taste buds will notice.
- Skip Overmixing Dough: Once the flour hits the wet ingredients, stop stirring after 20 seconds. That’s all it takes. I used to think more mixing = better cookies, but now I know it’s the fast lane to tough cookies. The dough should look shaggy, not smooth—like it’s still holding onto its secrets.
- Chill Dough Twice: First chill for 24 hours (yes, overnight), then shape the cookies and refrigerate them again for at least 30 minutes before baking. This isn’t just about convenience—it’s about texture. The second rest keeps the butter from melting too fast in the oven, so your cookies stay thick and pillowy, not thin and crispy. (Your future self will thank you.)
Troubleshooting this recipe
Dough Too Sticky
If your dough feels too sticky to handle, resist the urge to add more flour—it can make cookies dense. Instead, chill the dough for an extra 30 minutes to firm it up.
For immediate fixes, wet your hands slightly with cold water before shaping, or use a cookie scoop to portion without touching the dough. I’ve found that King Arthur Measure Up scoops work perfectly for this. 🧑🍳
Cookies Spread Too Much
Over-spreading usually means the dough wasn’t chilled long enough or the butter was too soft. For future batches, ensure your dough rests for the full 2 hours in the fridge. If you’re in a hurry, spread the dough on a baking sheet and freeze for 20 minutes before baking.
Also, use European-style butter like Plugrá, which has a higher fat content that helps maintain shape. 🥚
Dry or Crumbly Texture
Dry cookies often result from overmixing or too much flour. To fix, gently fold in 1 tablespoon of milk or heavy cream to the dough before baking. For prevention, mix just until combined—stop when flour streaks disappear.
If your dough feels crumbly, try adding 1 teaspoon of sour cream or Greek yogurt to add moisture without altering flavor. 💧
Pale or Underbaked Centers
If cookies emerge pale in the middle, they likely need more time in the oven. Increase baking time by 1-2 minutes and check again. For even baking, rotate sheets halfway through using the middle rack.
A digital oven thermometer (like Thermoworks) ensures your oven isn’t running hot or cold. 🌡️
Burnt Edges
Burnt edges happen when cookies bake too fast or the oven runs hot. Lower the oven temperature by 25°F (to 325°F) and bake for 1-2 minutes longer.
Ensure your baking sheets aren’t touching the oven racks, which can conduct heat unevenly. Use light-colored metal sheets instead of dark ones—they reflect heat better. 🔥
Flat or Thin Cookies
Flat cookies often result from skipping the chill step or using warm butter. Always chill dough for at least 2 hours, and store butter in the fridge until ready to use.
For thicker cookies, press dough balls slightly before baking or use a cookie press to create uniform shapes. I love the OXO Good Grips press for vintage-style cookies. 🍪
Nutrition facts
Frequently asked questions
Can I make these cookies without vanilla bean paste?
Double the vanilla extract to 4 teaspoons for the same rich flavor. For extra depth, scrape seeds from a 1-inch vanilla bean and mix them into the dough. The paste adds luxury, but pure extract works perfectly too.
How do I store these cookies to keep them fresh?
Store in an airtight container at room temperature for up to 5 days. For longer storage, freeze dough balls (unbaked) for 3 months or baked cookies (separated by parchment) for 2 months. The spices stay fragrant when sealed properly.
Can I substitute brown sugar with white sugar?
For a 1:1 substitution, add 1 teaspoon of molasses per cup of white sugar to mimic brown sugar's moisture and flavor. The cookies will be slightly lighter but still delicious. The brown sugar's caramel notes enhance the vintage spice profile.
What's the secret to getting that perfect vintage crunch?
The key is chilling the dough for 2+ hours and using European-style butter (like Plugrá). The cold butter creates steam during baking, giving that signature crackly top. Bake at 350°F for 10-12 minutes until edges are golden.
Can I make these gluten-free?
Replace the all-purpose flour with a 1:1 gluten-free blend (like Bob's Red Mill) plus ½ teaspoon xanthan gum. Expect slightly denser cookies—gluten-free flours absorb moisture differently. Test with ½ the batch first to adjust texture.