Desserts
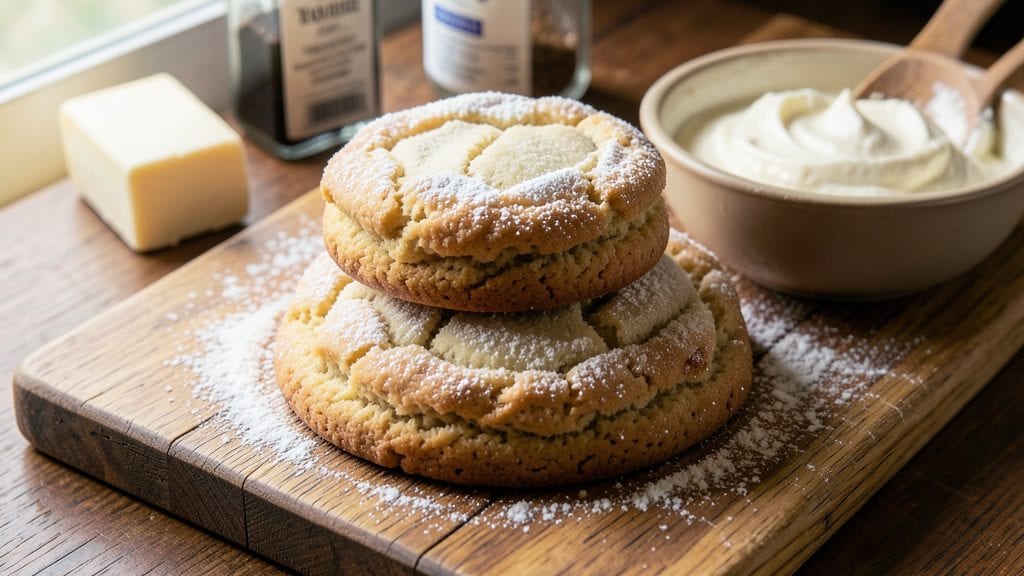
This old-fashioned sour cream sugar cookie recipe delivers the perfect balance of crisp edges and tender centers—just like Grandma used to make. ✨ The secret lies in the sour cream, which keeps them moist while the sugar coating adds that classic crunch.
I’ve perfected this recipe over years of baking holidays, and it never fails to impress.
The dough comes together with simple ingredients—sour cream, butter, sugar, eggs, and vanilla—but the magic happens in the technique. Rolling each cookie in powdered sugar before baking creates that signature crunch, while baking at 350°F ensures a golden finish.
This recipe is foolproof for beginners and delivers restaurant-quality results every time.
What you’ll end up with is a batch of cookies that’s soft inside, crisp outside, and coated in that signature sugar glaze. The aroma alone will fill your kitchen with nostalgia, and the taste?
Pure comfort. These cookies are perfect for holidays, gifts, or just treating yourself to a little homemade joy.
Whether you glaze them with vanilla or leave them dusted in sugar, these cookies are a classic for a reason. Let’s get baking—your kitchen (and taste buds) will thank you.
Ingredients for old fashioned sour cream sugar cookie
Butter, sugar, sour cream—just a handful of ingredients for cookies that taste like nostalgia.
| Ingredient | Amount | Notes |
|---|---|---|
| Unsalted Butter 🧈 | 1 cup | Cold, cubed for cutting in |
| Granulated Sugar 🍚 | 1 ½ cups | Superfine preferred for smooth texture |
| Powdered Sugar 🍚 | 1 cup | For rolling and glaze |
| Sour Cream 🥛 | ½ cup | Full-fat for best texture |
| Large Eggs 🥚 | 1 whole | Room temperature |
| Pure Vanilla Extract 🍯 | 1 tbsp | High-quality, no alcohol |
| All-Purpose Flour 🌾 | 3 ½ cups | Sifted, no substitutions |
| Baking Soda 🧂 | ½ tsp | Freshly measured |
| Salt 🧂 | ½ tsp | Fine sea salt |
| Vanilla Bean Seeds 🍯 | 1 tsp | Scraped from 1 pod |
| Vanilla Glaze 🍬 | 1 cup | Powdered sugar + milk |
The butter needs to be cold—cubed and chilled—so it cuts into the flour properly. Land O’Lakes or Plugrah are my go-tos for consistency, but any good-quality unsalted works. The sour cream is non-negotiable; full-fat only—low-fat makes these dry. For the sugar, superfine is ideal (like Domino), but if you’ve only got regular, pulse it in a food processor first. The vanilla? Scrape those seeds from a real vanilla bean—it’s worth the extra 30 seconds for that depth of flavor.
No vanilla bean? Double the extract (2 tbsp), but you’ll miss that little fleck of speck. Running out of powdered sugar for rolling? Granulated sugar works in a pinch, but it won’t give that signature crunch. The glaze can be skipped entirely if you’re feeling traditional—just roll the cookies in powdered sugar before baking. For the glaze, powdered sugar + milk (or heavy cream for richness) is classic, but a splash of vanilla extract makes it extra special.
These cookies keep for 5 days in an airtight container at room temperature, but honestly? They vanish in hours. For longer storage, freeze the dough balls—3 months max. Bake straight from frozen, adding 1-2 extra minutes. The secret to perfect cookies? Don’t overbake. They’ll look underdone, but they’ll set up as they cool. Trust the process—Grandma’s way always wins.
Why You'll Love This Recipe
- No-Fuss Dough: I swear by this recipe because it’s actually mix-and-bake—no chilling, no fussing with multiple bowls. Just cream the butter and sugar, toss in the sour cream (that’s the magic), and let the eggs bind it all. Honestly, I’ve made it while my coffee brewed.
- Tender-Crispy Magic: That buttery crunch with a soft center? The sour cream keeps them from drying out, and the powdered sugar dusting gives them that old-school sparkle. Between us, my kids pick the last ones off the plate—every time.
- Holiday or Snack Attack: These work for Christmas cookies, a quick breakfast with coffee, or even a last-minute dessert. I’ve used them to impress guests, packed them for school lunches, and yes, even eaten them straight from the dough (shh). Versatile? Absolutely.
- Leftovers That Last: They stay soft for days if you store them right—wrapped in foil or zipped in a bag. And because they’re budget-friendly (just five ingredients!), I can bake a batch and not feel guilty when half disappear in 48 hours. My secret weapon for stress-free baking.
Step-by-step instructions for old fashioned sour cream sugar cookies
Here's how to make these classic cookies with a perfect balance of crispy edges and soft centers.
👨🍳 Step 1: Cut in the Cold Butter and Sour Cream
In a large mixing bowl, combine the 1 cup cold, cubed unsalted butter and 0.5 cup sour cream. Using a pastry cutter or two forks, work the mixture until it reaches a crumbly consistency with pea-sized butter pieces remaining. This cold butter method creates that signature crunch we're after.
I like to press down firmly with the cutter—this helps distribute the butter evenly without melting it. You should see small butter droplets throughout the mixture. If it starts to look pasty, pop the bowl in the freezer for 5 minutes to firm things up again. This step is crucial for achieving that perfect texture balance.
👨🍳 Step 2: Add Wet Ingredients and Mix Until Combined
To the butter mixture, add the 1.5 cups granulated sugar, 1 whole large egg, 1 tbsp pure vanilla extract, and 1 tsp vanilla bean seeds. Mix with a wooden spoon or rubber spatula until just combined—don't overmix or you'll develop gluten and end up with tough cookies.
The dough should look shaggy but hold together when pressed. Here's where the sour cream really shines—it keeps the cookies tender while the butter gives that signature crunch. If the dough seems too sticky, chill it for 10 minutes before proceeding. This also prevents excessive spreading in the oven.
👨🍳 Step 3: Incorporate Dry Ingredients for Perfect Texture
In a separate bowl, whisk together the 3.5 cups all-purpose flour, 0.5 tsp baking soda, and 0.5 tsp salt. Gradually add this to your wet mixture, mixing just until the dough comes together. Be gentle—we're aiming for a soft dough that holds its shape when rolled.
Once combined, divide the dough into two equal portions and flatten into discs. Wrap each in plastic wrap and refrigerate for at least 1 hour (I prefer 2 hours for best results). This chilling step is non-negotiable—it firms up the dough, prevents excessive spreading, and intensifies the vanilla flavor.
🔪 Step 4: Roll and Cut Classic Cookie Shapes
Preheat your oven to 375°F and line two baking sheets with parchment paper. On a lightly floured surface, roll out one dough disc to about ¼-inch thickness. Use cookie cutters to create your desired shapes—traditional rounds work great, but stars or trees add festive flair.
Place cut-out cookies on the prepared baking sheets, spacing them about 1 inch apart. For extra flavor, sprinkle with a little extra vanilla bean seeds or a pinch of salt. Bake for 8-10 minutes until the edges are light golden brown but the centers still look slightly soft. They'll firm up as they cool.
🍽️ Step 5: Glaze and Enjoy Fresh from the Oven
While the cookies are still warm, prepare the 1 cup vanilla glaze by whisking together the 1 cup powdered sugar with 1-2 tablespoons milk until smooth. Drizzle over the cooled cookies immediately after baking for that classic sugar cookie finish.
Let the glazed cookies sit for 5 minutes before transferring to a wire rack. The glaze will set as they cool, creating that beautiful shiny finish. Serve warm for the ultimate experience—these cookies are best enjoyed fresh from the oven with a glass of cold milk or cup of coffee.
Pro Tips For Making Old Fashioned Sour Cream Sugar Cookie
- Cream the butter cold: Take the butter straight from the fridge—no softening needed. I learned this the hard way after over-creaming warm butter and ending up with greasy cookies that spread like pancakes. Cold butter creates flaky layers and holds its shape better.
- Whisk the sour cream: Give that sour cream a quick whisk before measuring—it’s thicker than you think. I used to scoop it straight from the tub and wondered why my dough was lumpy. A few strokes with a fork ensures it mixes smoothly into the butter-sugar base.
- Avoid overmixing the dough: Stop mixing as soon as the dough comes together—no need to knead it like bread. Overworking it develops gluten, and your cookies will turn out tough instead of tender. Just fold in the dry ingredients until barely combined.
- Chill the dough twice: Divide the dough into two portions, flatten into discs, and refrigerate for at least 2 hours—then again after shaping. I skipped the second chill once and ended up with cookies that spread into sad little puddles. Patience here guarantees thick, cake-like cookies.
Dietary considerations for old fashioned sour cream sugar cookie
Gluten-Free Adaptation
To make these cookies gluten-free, swap the 3.5 cups all-purpose flour with a 1:1 gluten-free flour blend like Bob's Red Mill or King Arthur. Add 1 extra teaspoon of xanthan gum to mimic gluten's binding properties.
Chill the dough longer—2-3 hours—since gluten-free doughs spread more. For extra tenderness, replace 2 tablespoons of the sour cream with 2 tablespoons of Greek yogurt. 💪
Dairy-Free Options
For a dairy-free version, use vegan butter (like Miyoko's or Earth Balance) and replace the 0.5 cup sour cream with 0.5 cup full-fat coconut yogurt.
The egg can stay as-is, but if you want a fully vegan cookie, use a flax egg (1 tbsp ground flaxseed + 3 tbsp water). The texture will be slightly denser but still delicious. Taste as you go—dairy-free ingredients can affect sweetness.
Lower Sugar Version
Reduce the 1.5 cups granulated sugar to 1 cup and replace the 1 cup powdered sugar with ½ cup powdered sugar + ½ cup coconut sugar for a lower-glycemic option. Use 1 extra tablespoon of vanilla extract to compensate for the reduced sweetness.
The cookies will still be tender but with a slightly caramelized flavor. Pair them with Greek yogurt dip for extra protein. ✨
Nut-Free Allergy Safe
This recipe is already nut-free, but double-check your ingredients—some brands of vanilla extract or powdered sugar may process in nut facilities. Use a dedicated nut-free kitchen if severe allergies are a concern.
For extra safety, bake on a separate tray from any nut-containing foods. The classic flavors shine even without nuts, making these cookies a safe treat for allergy-friendly gatherings.
Egg-Free Substitution
Replace the 1 egg with 1 tablespoon ground flaxseed + 3 tablespoons water (let it sit for 5 minutes to thicken). The texture will be slightly denser, but the cookies retain their signature tenderness.
For best results, increase the chilling time to 3 hours to help the dough firm up. The flax egg adds a subtle earthy note that pairs beautifully with the vanilla. 💡
Nutrition facts
Frequently asked questions
Why does this recipe use sour cream instead of regular milk or cream?
The sour cream creates a tender, cake-like texture that stays moist longer than traditional sugar cookies. Its acidity also helps tenderize the gluten, preventing dryness while baking. The classic old-fashioned method relies on this ingredient for that signature soft center and crisp edges—it’s what makes these cookies truly special.
Can I make these cookies ahead of time?
The dough can be refrigerated for up to 3 days or frozen for 3 months. For best results, bake from frozen, adding 1-2 extra minutes to the baking time. The glaze should be applied fresh after baking for that perfect shine. These cookies actually taste better the next day when the flavors meld.
What's the secret to getting the perfect sugar coating?
Roll the cut-out cookies in powdered sugar before baking—this creates that iconic crunchy exterior. For extra sparkle, brush with a thin vanilla glaze after baking. The key is using superfine sugar (or pulsing regular sugar in a food processor) to ensure even coverage. Don’t skip this step—it’s what makes these cookies stand out!
Why do my cookies spread too much?
Overmixing the dough or skipping the chilling step are the most common causes. Always chill the dough for at least 1 hour before rolling, and avoid pressing down too hard when mixing. If your oven runs hot, reduce the temperature to 350°F and bake for 10-12 minutes. The cookies should hold their shape but still be soft in the center.
Can I decorate these cookies with icing or sprinkles?
Yes! While the classic version features a simple vanilla glaze, you can absolutely add sprinkles or piping decorations. Let the cookies cool completely before adding icing to prevent melting. For extra flair, try a royal icing border—just remember these cookies are delicate, so avoid heavy toppings that might weigh them down.