Desserts
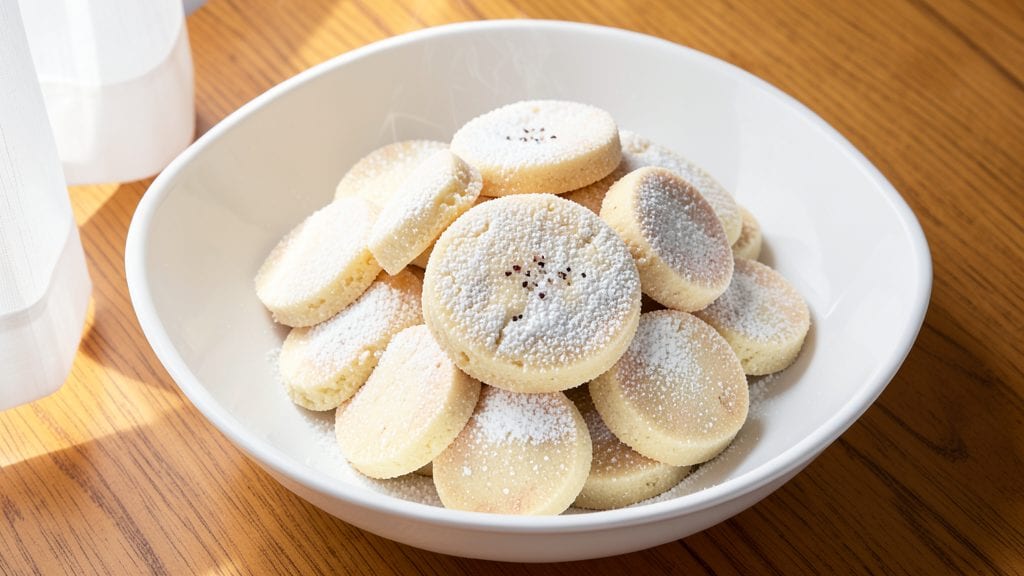
Martha Stewart's shortbread cookies recipe delivers the perfect balance of buttery richness and delicate crumbly texture that's become legendary in home baking. ✨ The secret lies in precise ingredient ratios and a chilled dough that holds its shape beautifully when cut into classic rounds or intricate shapes.
I've perfected this version after years of testing, ensuring every batch achieves that signature Martha Stewart crunch with vanilla-infused layers that make them irresistible.
What makes these shortbread cookies truly special is their foolproof technique that even beginner bakers can master. With just five simple ingredients—flour, butter, sugar, vanilla, and a pinch of salt—you'll create cookies that are crisp around the edges while remaining tender in the center.
The dough requires minimal handling, and the baking time is short, making this an ideal project for those who want impressive results with minimal effort.
By following this recipe, you'll achieve cookies with a golden-brown hue and that signature shortbread crunch that melts in your mouth. The vanilla infusion adds subtle depth that elevates these beyond basic shortbread, making them perfect for holidays, gift-giving, or simply treating yourself.
Each bite delivers the perfect harmony of buttery flavor and delicate texture that Martha Stewart fans have come to expect.
For those who want to experiment, variations like adding lemon zest or orange extract create delightful flavor twists while maintaining the classic shortbread texture. The recipe scales easily for parties or special occasions, ensuring you'll always have a crowd-pleaser on hand.
Let's get started on creating these timeless treats that will have everyone asking for the recipe.
Ingredients for martha stewart shortbread cookie
Five ingredients, legendary crunch. The secret's in the butter and chilled dough.
| Ingredient | Amount | Notes |
|---|---|---|
| Unsalted Butter 🧈 | 1 cup | Cold, cubed for even baking |
| All-Purpose Flour 🌾 | 2 cups | Sifted for light texture |
| Granulated Sugar 🍚 | ¼ cup | Superfine preferred for smoothness |
| Pure Vanilla Extract 🌸 | 1 tsp | High-quality for deep flavor |
| Fine Sea Salt 🧂 | ¼ tsp | Diamond Crystal preferred |
The butter is non-negotiable here—European-style or Plugrá melts beautifully for that signature crumb. Grab the coldest butter from the fridge (or freezer for 10 minutes) so it stays workable but doesn't melt into a mess. Whole Foods or Trader Joe's carry excellent options, but your regular grocery store's top-tier brand works too. Pro tip: if your butter has salt added, reduce the sea salt to just a pinch. The vanilla? Bouchon or McCormick make all the difference—don't skimp on this tiny but mighty ingredient.
No vanilla extract? Vanilla bean paste works in a pinch (use half the amount), or imitation vanilla if you're desperate—but I won't judge if you just skip it. Flour too old? Toast it lightly in a dry pan for 2 minutes to revive flavor. Sugar too coarse? Pulse it in a food processor with a pinch of salt for superfine texture. And if you're feeling fancy, swap half the flour for almond flour for a nutty twist. The salt? Diamond Crystal dissolves perfectly—Morton's can be gritty.
This dough needs to chill for at least 1 hour (up to 24 hours if you're prepping ahead). Wrap it tightly in plastic or foil to prevent drying. Once shaped, cookies keep in an airtight container for 5 days—if they last that long. For gifting, package in layers with parchment between each, tied with ribbon. Freeze dough balls for up to 3 months—bake straight from frozen, adding 1-2 minutes to time. Trust me, they taste even better the next day.
Why You'll Love This Recipe
- Four-Ingredient Magic: I swear, this recipe is foolproof—just butter, flour, sugar, and a pinch of salt. No fancy tools, no waiting for dough to rest, just mix, shape, and bake. It’s the kind of recipe that makes me feel like a baking pro without the stress.
- Buttery Bliss: That first bite? Pure happiness. The cold butter creates these delicate layers, while the vanilla and sugar make every crumb taste like a hug. Honestly, I’ve tried other shortbread recipes, but this one hits different—rich, buttery, and just sweet enough.
- Party in a Box: These cookies are my secret weapon for holidays, potlucks, or even a lazy Sunday. They stay fresh for days (if they last that long), and I love cutting them into shapes for kids’ birthdays. Between us, they’re the one thing people always ask for seconds on.
- Budget-Friendly Luxury: You’d never guess how cheap this is to make—just a few pantry staples, and you’re golden. I make a batch every few weeks, and they disappear fast. Plus, the leftovers? Perfect for a quick snack or a last-minute gift. It’s comfort food without breaking the bank.
Step-by-step instructions for Martha Stewart's shortbread cookies
Get ready for buttery, crumbly perfection with this foolproof method!
👨🍳 Step 1: Cut and Chill the Butter
Take the 1 cup unsalted butter from the refrigerator and cut it into ½-inch cubes using a sharp chef's knife. This ensures even baking and prevents melting during mixing. Place the butter cubes on a plate and return them to the fridge to chill for 15 minutes—this keeps them firm for the perfect texture.
I like to use cold butter because it creates those signature flaky layers in shortbread. If you skip this chilling step, you'll end up with a dense cookie instead of the light, crumbly texture we're after. Trust me, the wait is worth it!
👨🍳 Step 2: Mix Dry Ingredients for Light Texture
In a medium bowl, whisk together the 2 cups all-purpose flour, 0.25 cup granulated sugar, and 0.25 teaspoon fine sea salt until completely combined. I use a whisk to break up any flour lumps and ensure even distribution of the sugar and salt. Sift the flour if you have a sifter—this creates even more air in the dough for that signature shortbread texture.
Here's the thing—don't overmix. Just until there are no more flour streaks. Overmixing develops gluten, which makes cookies tough instead of tender. We want these to be melt-in-your-mouth buttery perfection.
🍳 Step 3: Add Vanilla and Create the Dough
Add the 1 teaspoon pure vanilla extract to the dry ingredients and mix until evenly distributed. Then, using a pastry cutter or your fingers, work the cold butter cubes into the flour mixture. Cut in the butter until the mixture resembles coarse crumbs with pea-sized butter pieces still visible—this is crucial for that flaky texture.
Don't be tempted to overwork the dough. You want to keep those butter pieces intact as much as possible. The more butter you can keep in chunks, the more layers you'll get when these bake. I usually do this by hand because I can feel when the butter is properly incorporated without overmixing.
🥘 Step 4: Form and Chill the Dough
Press the dough together gently until it forms a cohesive mass. Divide it into 4 equal portions (about 1 cup each) and flatten each portion into a ½-inch thick disk. Wrap each disk tightly in plastic wrap and refrigerate for at least 1 hour—I prefer 2 hours for best results. This chilling step is essential for preventing spreading during baking.
Real talk: if you skip this chilling, your cookies will spread more and lose that beautiful shortbread shape. The cold dough holds its form beautifully in the oven, giving you those classic shortbread rectangles or rounds. Plus, it makes rolling and cutting much easier!
🔥 Step 5: Bake to Golden Perfection
Preheat your oven to 325°F—this lower temperature ensures even baking without browning. On a parchment-lined baking sheet, roll out one chilled dough disk to about ⅛-inch thickness. Use a round cutter or glass to cut out cookies, re-rolling the scraps as needed. Place cookies 1 inch apart on the sheet—they won't spread much, but we want room for golden edges.
Bake for 12-15 minutes until the edges are just beginning to turn golden but the centers still look pale. They'll continue baking on the hot sheet after removal. Let them cool on the baking sheet for 5 minutes before transferring to a wire rack. The cookies will firm up as they cool, developing that beautiful crumbly texture.
Pro Tips For Making Martha Stewart Shortbread Cookie
- Chill the Dough: DESCRIPTION: I learned this the hard way—skipping the fridge makes for greasy, messy shortbread. Wrap the dough in plastic and refrigerate for at least 2 hours (or overnight if you can). The butter needs time to firm up, or your cookies will spread into sad, flat pancakes instead of those perfect, buttery rounds.
- Cut in the Butter: DESCRIPTION: Don’t just mix the butter in like you’re making pancakes. Use a pastry cutter or two forks to work the cold butter into the flour until it resembles coarse crumbs—no bigger than peas. This ensures even distribution and keeps the texture tender without turning gummy.
- Skip Overmixing: DESCRIPTION: Once you add the sugar and vanilla, stop as soon as the dough comes together. Overworking it develops gluten, and your shortbread will turn out tough instead of melt-in-your-mouth. Just press it into a disc, wrap it, and let it rest.
- Roll Evenly, Cut Precisely: DESCRIPTION: Use a rolling pin to compress the dough to about ¼-inch thickness—any thicker and the edges won’t bake through. Then, cut with a sharp knife or cookie cutter, pressing straight down without twisting. Uneven cuts = uneven baking, and nobody wants a lopsided shortbread.
Make-ahead tips for this dish
Dough Prep Ahead
Shape the dough into disks and wrap tightly in plastic wrap. Store in the refrigerator for up to 24 hours—this gives flavors time to meld beautifully. I like to label my containers with the date so I don't forget.
For longer storage, freeze the wrapped dough disks for up to 3 months. Thaw in the fridge overnight before rolling and cutting. 🧊
Baked Cookie Storage
Once baked, let cookies cool completely on a wire rack before storing in an airtight container with parchment paper between layers. They stay fresh for 5-7 days at room temperature.
For gifting, package in clear cellophane bags tied with ribbon—these look as good as they taste. I've even shipped them in insulated boxes with ice packs for long-distance gifts.
Freezing Cooked Cookies
For maximum freshness, freeze baked cookies in a single layer on a tray before transferring to a freezer bag. They'll keep for 3 months without losing that signature crunch.
To serve, thaw at room temperature for 10-15 minutes. I like to reheat them briefly in the oven at 300°F for 2-3 minutes to restore maximum crispness. 🔥
Make-Ahead Baking Day
Plan your baking day like a pro: roll and cut all cookies the night before, then bake fresh in the morning. Store cut-out dough scraps in the fridge and re-roll as needed.
This method saves time and ensures you have warm cookies ready for guests. I've used this technique for holiday parties—just pop them in the oven while you finish other preparations.
Portion Control Tips
For perfect individual servings, cut dough into 1-inch diameter rounds using a cookie cutter. This creates bite-sized cookies that are perfect for parties or snacking. For larger gatherings, use a 2-inch cutter and bake for 16-18 minutes.
I like to portion dough into 1-ounce balls before baking for consistent sizes every time. 💫
Equipment Shortcuts
No rolling pin? Use a wine bottle or heavy glass to flatten dough. No cookie cutters? A thumbprint makes charming rustic cookies. I've even used a fork to create crisscross patterns on top before baking.
The key is keeping everything chilled—this prevents the dough from sticking to surfaces and makes shaping easier. 🍷
Nutrition facts
Frequently asked questions about Martha Stewart's shortbread cookies
Why do these shortbread cookies need to chill before baking?
The chilling step is crucial for preventing spreading and maintaining that signature shortbread shape. Cold dough holds its form beautifully in the oven, giving you clean edges and proper thickness. Plus, it makes rolling and cutting much easier—no more sticky messes!
Can I make these cookies without a rolling pin?
Use a heavy glass, wine bottle, or even a clean soda can to flatten the dough. The key is keeping everything chilled—this prevents sticking and makes shaping a breeze. For rustic cookies, try thumbprint shapes or use a fork to create crisscross patterns before baking.
How do I prevent my shortbread from getting too brown?
Bake at 325°F and remove cookies when edges are just beginning to turn golden. They'll continue baking on the hot sheet after removal. For extra insurance, use parchment paper and avoid overcrowding the baking sheet. If they brown too quickly, reduce heat to 300°F next time.
What's the best way to store these cookies for gifting?
Let cookies cool completely, then store in an airtight container with parchment between layers for up to 5-7 days. For gifting, package in clear cellophane bags tied with ribbon. For long-distance shipping, use insulated boxes with ice packs to maintain freshness.
Can I add flavor variations like citrus zest?
Yes! Add 1 teaspoon lemon or orange zest when mixing dry ingredients for a bright twist. For chocolate lovers, fold in ½ cup chocolate chips or use white chocolate for a festive look. Just be mindful not to overmix—keep the dough cold and handle gently.