Desserts
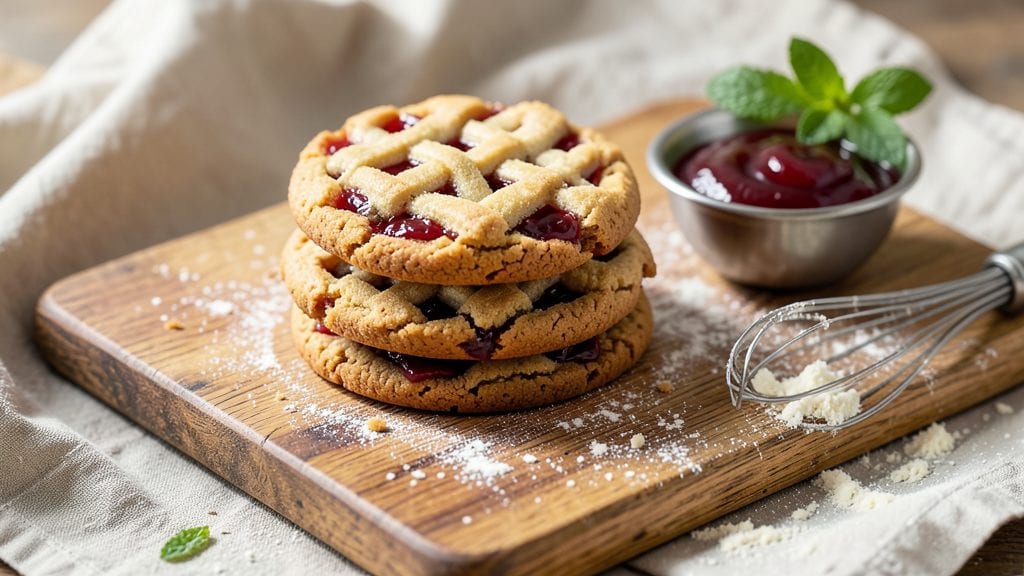
This jam jam cookie recipe delivers the perfect balance of buttery, crisp edges and tender centers filled with gooey fruit jam—every bite is a nostalgic trip to childhood dessert tables. The secret lies in a precise dough-to-jam ratio that prevents sogginess while keeping the filling luscious.
I developed this recipe after testing dozens of variations, ensuring the wafers hold their shape yet remain delicate enough to melt in your mouth.
The process is straightforward but requires attention to detail: chilled dough prevents spreading, while a quick jam filling assembly keeps the fruit from leaking.
These cookies bake in just 12 minutes at 375°F, yielding 24 perfectly portioned treats with a golden crust that contrasts beautifully against the vibrant jam centers. The buttery flavor shines through, making them irresistible straight from the oven or dusted with powdered sugar.
What sets these apart is the textural contrast—crisp edges give way to tender dough, while the jam stays warm and spreadable inside. Perfect for holidays, potlucks, or a cozy afternoon treat, they transport you to a bakery without the fuss.
The recipe scales easily, so you can make a single batch for personal indulgence or double it for sharing.
For an extra touch, consider drizzling melted chocolate between the layers or adding a sprinkle of flaky sea salt to enhance the sweetness. The possibilities are endless, but the foundation remains foolproof—buttery, crisp, and jam-packed with flavor. Let's get baking!
Ingredients for jam jam cookie
Buttery dough, vibrant jam, and crisp edges—just twelve ingredients for nostalgic bakery-style cookies.
| Ingredient | Amount | Notes |
|---|---|---|
| Unsalted Butter 🧈 | 1 cup | Cold, cubed for cutting into dough |
| Granulated Sugar 🍚 | ¾ cup | Superfine preferred for even texture |
| Light Brown Sugar 🍚 | ½ cup | Packed firmly for accurate measure |
| Large Eggs 🥚 | 2 whole | Room temperature for even mixing |
| All-Purpose Flour 🌾 | 2 ½ cups | Sifted for light, airy dough |
| Baking Powder 🍞 | 1 tsp | Aluminum-free for reliable rise |
| Diamond Crystal Kosher Salt 🧂 | ½ tsp | Fine grain for even distribution |
| Vanilla Extract 🌸 | 1 tsp | Pure extract, not imitation |
| Raspberry Jam 🍓 | 1 cup | Seedless, thick consistency |
| Powdered Sugar 🍚 | ¼ cup | For dusting finished cookies |
| Semisweet Chocolate Chips 🍫 | ¼ cup | Optional for drizzling between layers |
| Flaky Sea Salt 🧂 | ½ tsp | For finishing if desired |
The butter is non-negotiable here—European-style or high-fat American butter gives that signature richness. Grab a 1-pound block from Whole Foods or your local creamery for the best flavor. Keep it cold when cutting into the dough—room temperature butter ruins the texture. For the jam, Mott's or Bonne Maman are my go-tos, but any seedless, thick jam works. Avoid chunky jams—they don't spread evenly between layers. The sugar matters too: superfine sugar dissolves better, but regular granulated works if you pulse it in a food processor. Pro tip: measure your brown sugar while it's still in the bag—pack it firmly to avoid under-measuring.
No raspberry jam? Strawberry, apricot, or blackberry all work beautifully—just adjust the color with a tiny bit of food coloring if you're picky. Short on butter? Coconut oil works in a pinch, but the flavor won't be the same. The vanilla extract should say 'pure' on the bottle—imitation won't cut it. For the chocolate chips, Guittard or Ghirardelli melt perfectly. Want to skip them? Drizzle with melted chocolate instead. The baking powder is crucial—double-check the expiration date—old baking powder makes flat cookies. And if you're feeling fancy, swap the powdered sugar for confectioners' sugar with added cornstarch to prevent clumping.
Store the dough between parchment paper in the fridge for up to 3 days—it actually improves as it rests. The baked cookies keep in an airtight container for 5 days, but they're best fresh. For longer storage, freeze the unbaked dough balls on a tray, then transfer to a bag for 3 months. The jam filling stays fresh for 1 week in the fridge, but it's best used within 3 days. Pro move: assemble the cookies right before serving so the jam stays gooey. If you make extras, freeze them—they reheat beautifully in the oven for 2-3 minutes at 350°F.
Why You'll Love This Recipe
- No Mixer Needed: I swear by this recipe when my stand mixer’s on vacation. Cream the butter and sugars by hand—it’s just 3 minutes of elbow grease, and the warm, spready dough is worth it.
- Buttery Jam Bomb: That rich butter-to-sugar ratio? It’s the secret. The cookies stay soft at the edges while the jam swirls stay gooey—like a hug for your taste buds, especially when the brown sugar caramelizes just right.
- Party in a Jar: Honestly, these are my go-to for potlucks or last-minute gifts. Dump dough into jars, freeze them, and bake whenever—no one will guess they’re not fresh-baked. (Yes, even on a Tuesday night.)
- Budget Baking Wins: Five ingredients, zero weird shortcuts. The eggs add structure, the flour keeps it sturdy, and the jam (store-bought or homemade) stretches your dollar. My wallet thanks me every time.
Step-by-step instructions for jam jam cookies recipe
Here's how to create crispy, buttery wafers with a jam-filled center that's perfect for sandwiching.
Cream Butter and Sugars for Maximum Flavor
In a stand mixer fitted with the paddle attachment, beat the 1 cup unsalted butter and 0.75 cup granulated sugar on medium speed for 3-4 minutes until light and fluffy. The mixture should nearly triple in volume and become pale in color. This step is crucial—it incorporates air that creates those beautiful crackly tops.
Add the 0.5 cup light brown sugar and mix for another 1-2 minutes until fully combined. The brown sugar adds moisture and depth of flavor that white sugar alone can't provide. Scrape down the sides of the bowl with a rubber spatula to ensure even mixing. I like to do this every few minutes to keep the butter from overheating.
Incorporate Eggs and Flavorings
Add the 2 whole large eggs, one at a time, mixing on low speed for 30 seconds after each addition until fully incorporated. The eggs help bind the dough and add richness. Then add the 1 teaspoon vanilla extract and mix for another 10 seconds until just combined.
In a separate bowl, whisk together the 2.5 cups all-purpose flour, 1 teaspoon baking powder, and 0.5 teaspoon diamond crystal kosher salt. Gradually add the dry ingredients to the wet mixture, mixing on low speed for 30-45 seconds until just combined. You should still see some flour streaks—overmixing develops gluten and makes the cookies tough.
Shape and Bake the Cookie Wafers
Preheat your oven to 350°F and line two baking sheets with parchment paper. Divide the dough into 2 equal portions and roll each portion into a ¼-inch thick log, about 12 inches long. Wrap each log tightly in plastic wrap and refrigerate for at least 30 minutes (or up to 24 hours). Chilling helps the dough hold its shape and prevents excessive spreading.
Slice the chilled logs into ¼-inch thick rounds and place them 2 inches apart on the prepared baking sheets. Bake for 10-12 minutes until the edges are golden brown but the centers still look slightly underdone. They'll continue cooking on the hot pan after you remove them from the oven. Let them cool on the baking sheet for 5 minutes before transferring to a wire rack.
Assemble the Jam-Filled Sandwiches
Once the wafers have cooled completely, spread 1 teaspoon of the raspberry jam evenly onto the flat side of half the wafers. Be generous but not messy—you want enough filling to ooze slightly when you bite in. For extra indulgence, sprinkle a few semisweet chocolate chips on top of the jam before sandwiching.
Press the remaining wafers on top to create the sandwiches. Dust the finished cookies with 0.25 cup powdered sugar for a sweet, snowy finish. For a sophisticated touch, sprinkle with 0.5 teaspoon flaky sea salt to balance the sweetness. Serve immediately or store in an airtight container for up to 5 days—though they won't last that long!
Pro Tips For Making Jam Jam Cookie
- CREAM THE BUTTER SLOW: Mix the butter and sugars until it’s light and fluffy—about 3 minutes with a stand mixer or until the dough looks like it could climb a wall. I used to rush this, and the cookies turned out dense; patience here makes all the difference.
- CHILL THE DOUGH LONG: Wrap the dough in plastic and refrigerate for at least 24 hours. Yes, it’s tempting to bake right away, but this lets the flour relax and the jam flavors meld—your cookies will stay soft and jammy, not crumbly.
- WEIGH THE FLOUR RIGHT: Spoon flour into the measuring cup, then level it off with a knife. Packing it down or scooping straight from the bag adds extra moisture, and these cookies need just enough structure to hold the jam without falling apart.
- BAKE ONE SHEET AT A TIME: Crowding the pan makes the edges spread and the centers stay undercooked. Use one sheet, space the dough balls 2 inches apart, and rotate halfway through—your cookies will bake evenly, with crisp edges and chewy centers.
Perfect pairings for these flavors
Jam Flavor Variations
Swap the raspberry jam for strawberry to create a classic red velvet-inspired cookie with a bright, tangy kick. For a tropical twist, use mango or guava jam—both add natural sweetness and vibrant color.
I love blackberry jam for its deep, rich flavor, which pairs beautifully with the buttery dough. For a seasonal option, peach jam brings a summery sweetness that's perfect for warm weather gatherings. 🍓
Drink Pairings
A glass of chilled milk is my go-to pairing—it balances the sweetness and cools the palate. For something more sophisticated, try sparkling rosé wine (about 45°F) to complement the fruit flavors.
If you prefer beer, a light lager like Corona or Heineken keeps the experience refreshing without overpowering the cookies. For a non-alcoholic option, iced hibiscus tea adds a floral contrast that enhances the jam's natural sweetness. 🍷
Garnish Ideas
For a festive touch, drizzle melted white chocolate between the layers before pressing the cookies together. A sprinkle of crushed pistachios adds crunch and a pop of color. I also love adding edible gold leaf for a luxurious finish—it looks stunning and adds a subtle metallic note.
For a simple but effective garnish, toasted coconut flakes bring a tropical vibe that pairs perfectly with tropical jams like mango or pineapple. ✨
Seasonal Twists
In autumn, use apple or cranberry jam for a spiced twist—add a pinch of cinnamon to the dough for extra warmth. For winter holidays, gingerbread spice jam (homemade or store-bought) creates a cozy, aromatic cookie.
Spring calls for peach or apricot jam, while summer is perfect for blueberry or strawberry variations. Each season brings a unique flavor profile that keeps these cookies exciting year-round. 🌸
Savory Contrasts
For a unique twist, add a pinch of flaky sea salt or smoked paprika to the jam before assembling. A thin layer of cream cheese between the wafers adds a tangy contrast that balances the sweetness beautifully.
I’ve also experimented with chocolate-hazelnut spread for a Nutella-inspired cookie that’s rich and indulgent. These savory elements elevate the classic sweet profile into something unexpected and delicious. 💫
Nutrition facts
Frequently asked questions
Can I make these cookies without a stand mixer?
Use a sturdy hand mixer or even a wooden spoon for creaming the butter and sugars. Work in 30-second bursts to avoid overheating the butter. The key is mixing until light and fluffy—about 5-7 minutes total by hand. Just be patient and scrape the bowl often to ensure even mixing.
How do I prevent the jam from leaking out?
Use a thick, seedless jam and spread it sparingly—about 1 teaspoon per cookie. Chill the assembled cookies for 15 minutes before serving to help the jam set slightly. For extra stability, press the cookies together firmly and store them in a cool place until ready to eat.
What’s the best way to store these cookies?
Keep them in an airtight container at room temperature for up to 5 days. For longer storage, freeze the unbaked dough balls for 3 months or the fully assembled cookies (without powdered sugar) for 2 months. Thaw in the fridge overnight for best texture.
Can I use homemade jam instead of store-bought?
Yes! Just ensure it’s thick and seedless—thin or chunky jams can make the cookies soggy. If your homemade jam is too runny, simmer it uncovered for 5-10 minutes to thicken. For extra flavor, add a pinch of vanilla bean powder or citrus zest to the dough.
Why did my cookies spread too much?
Overmixing the dough or skipping the 30-minute chill causes excessive spreading. Keep the butter cold, measure flour accurately, and avoid overworking the dough. For crispier edges, bake at 375°F instead of 350°F and reduce baking time by 1 minute.