Desserts
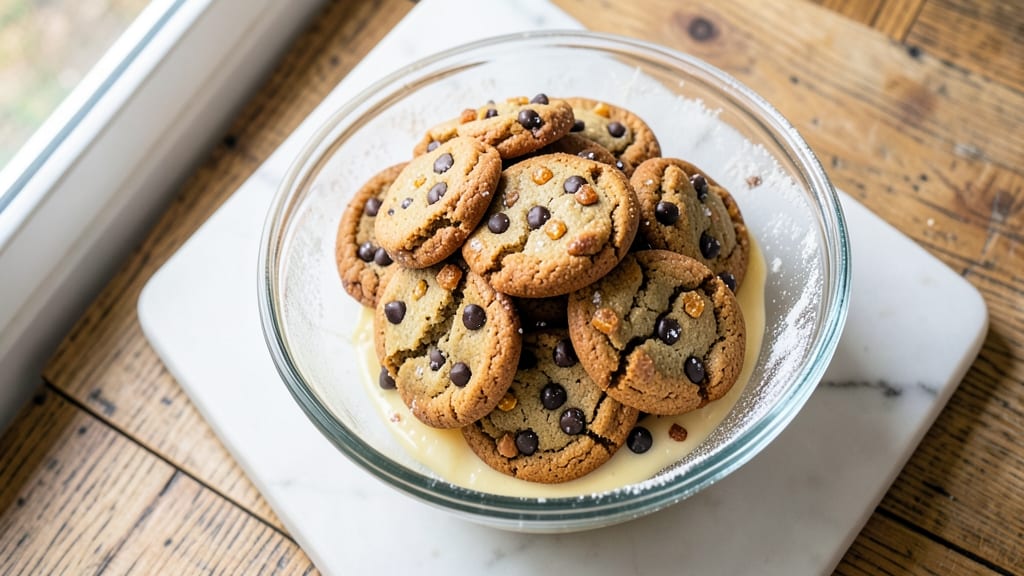
This Buttercrunch cookie recipe delivers the perfect balance of crispy, crunchy edges and gooey chocolate centers that make every bite irresistible. The secret lies in the precise ratio of butter to flour, creating those signature wafers that shatter with each bite while revealing molten chocolate hearts.
I've perfected this recipe over years of baking, ensuring the texture is consistently crisp yet tender—never too dry or too cakey.
The process is straightforward but requires attention to detail, especially when baking at a precise 350°F to achieve that signature crunch. You'll work with just 6 key ingredients, including high-quality butter and toffee bits for added texture, though traditionalists can substitute with chopped nuts if preferred.
The dough is rolled thin and cut into classic rounds before baking, where the edges crisp while the centers stay soft and chewy.
What you'll end up with is a batch of cookies that look elegant enough for a holiday dessert table but are simple enough for a weeknight treat. The contrast of crispy, buttery edges and warm, gooey chocolate centers creates a texture that's impossible to resist.
These cookies stay fresh for days, making them perfect for gifting or enjoying with a cup of coffee.
Ready to master this classic? The recipe includes tips for achieving the perfect texture every time, plus optional finishing touches like a chocolate drizzle or sprinkles. Let's get baking—your kitchen will smell like heaven in just 15 minutes of prep time.
Ingredients for buttercrunch cookie
Six ingredients, one magical texture—crispy edges, gooey chocolate hearts that’ll have everyone begging for seconds.
| Ingredient | Amount | Notes |
|---|---|---|
| Unsalted Butter 🧈 | 1 cup | Cold, cubed for rolling |
| Granulated Sugar 🍚 | ¾ cup | Superfine preferred for smoothness |
| All-Purpose Flour 🌾 | 2 cups | Sifted, light texture |
| Dark Chocolate Chips 🍫 | 1 ½ cups | Semi-sweet, 60% cocoa |
| Toffee Bits 🍯 | ½ cup | For signature crunch |
| Vanilla Extract 🌿 | 1 tsp | Pure, high-quality |
| Salt 🧂 | ½ tsp | Fine sea salt |
| Egg 🥚 | 1 whole | Room temperature |
| Baking Soda 🍃 | ¼ tsp | For lift |
The butter is non-negotiable here—European-style unsalted (like Plugrá) gives that signature rich flavor. Cold cubes are key for rolling the dough thin, so don’t let it soften in your hands. For the chocolate chips, Ghirardelli or Enjoy Life are my go-tos—they melt perfectly. Toffee bits? Trader Joe's has the best pre-made ones, but you can chop up homemade toffee if you're ambitious. The vanilla extract should be pure—none of that imitation stuff. And if you're feeling fancy, Madagascar Bourbon vanilla adds a depth that’s worth the splurge.
No toffee bits? Chopped pecans or walnuts work in a pinch, though they won’t give that same caramel crunch. Short on dark chocolate? Melt a chocolate bar and let it cool to chip form—just make sure it’s at least 60% cocoa. The dough needs to be cold when you roll it, so if your kitchen’s warm, chill the dough ball for 15 minutes before cutting. And if you’re worried about the texture being too dry, add 1 tbsp milk to the dough—it keeps everything tender.
These cookies keep for 5-7 days in an airtight container, though they’ll lose that signature crunch after day 3. For longer storage, freeze the unbaked dough balls—wrap them individually in parchment and freeze for up to 3 months. When you’re ready to bake, just pop them straight from the freezer onto the sheet. Pro tip: Let them cool completely on the pan before transferring to avoid soggy bottoms. And if you’re gifting? Stack them in layers with parchment paper between each batch—they’ll stay crisp for days.
Why You'll Love This Recipe
- No-Fuss Mixing: I swear by this dough—just cream butter and sugar, toss in dry ingredients, then fold in the chocolate and toffee. No stand mixer drama, no overworking the batter. Honestly, I’ve made it with my hands while chatting on the phone.
- Crunchy-Creamy Magic: That crispy buttercrunch edge paired with gooey dark chocolate and salty toffee bits? It’s the kind of cookie that disappears in minutes. The sugar caramelizes just enough to give it that addictive snap.
- Party-Ready in Minutes: Whether it’s a last-minute teacher gift or a holiday cookie tray, these bake up perfectly every time. I’ve frozen them for months, and they still taste fresh—ideal for when you need a crowd-pleaser that doesn’t require fancy plating.
- Pantry Staple Power: You’re already using butter, sugar, and flour—just add chocolate and toffee. No weird ingredients, no extra shopping. Between us, I’ve made these with whatever chips I had on hand, and they’re still dangerously good.
Step-by-step instructions for buttercrunch cookies
Here's how to make these irresistible cookies with crispy edges and gooey chocolate centers—every bite is pure magic.
Cream the Butter and Sugar Together
In a large mixing bowl, combine the 1 cup unsalted butter and 0.75 cup granulated sugar. Using an electric mixer on medium speed, beat for about 3-4 minutes until the mixture is light and fluffy. You'll notice it nearly doubles in volume and turns pale—this is crucial for that signature crispy texture. If you're using superfine sugar, it'll blend even faster, so keep an eye on it.
Here's the thing—don't rush this step. The air incorporated here creates those beautiful crackly edges. If your butter isn't cold enough, the dough will spread too much in the oven, so make sure it's chilled before starting. I like to press my finger into the butter; if it leaves a slight dent but holds its shape, it's perfect.
Mix in the Wet Ingredients
Add the 1 whole egg to the butter-sugar mixture and beat on low speed for 30 seconds until fully incorporated. Then, stir in the 1 tsp vanilla extract. The mixture should look smooth and well-combined. Next, whisk together the 2 cups all-purpose flour, 0.5 tsp salt, and 0.25 tsp baking soda in a separate bowl to avoid overmixing.
Gradually add the dry ingredients to the wet mixture, mixing on low speed just until combined. You'll want to see a few flour streaks remaining—this prevents tough cookies. Real talk: Overmixing develops gluten, which makes cookies chewy instead of crispy. Once the dough comes together, fold in the 1.5 cups dark chocolate chips and 0.5 cup toffee bits by hand using a silicone spatula. Make sure they're evenly distributed throughout the dough.
Chill the Dough for Perfect Texture
Divide the dough into two equal portions and flatten each into a 1-inch thick disk. Wrap each disk tightly in plastic wrap and refrigerate for at least 1 hour—this is non-negotiable. Chilling the dough solidifies the butter, which prevents excessive spreading in the oven and ensures those crispy edges. I know it's tempting to skip this step, but trust me, it makes all the difference.
While the dough chills, preheat your oven to 350°F and line two baking sheets with parchment paper. The dough should be firm enough to hold its shape when you press it. If it's too soft, give it another 20-30 minutes in the fridge. This step is the secret to achieving that perfect buttercrunch texture—crispy on the outside, tender on the inside.
Roll and Cut the Cookies
Once the dough is chilled, remove one disk and place it between two sheets of parchment paper. Using a rolling pin, roll the dough to a ¼-inch thickness. I like to use a ruler to ensure even thickness—this guarantees consistent baking. Cut the dough into 2-inch squares using a sharp knife or pizza cutter. Place the cut cookies 2 inches apart on the prepared baking sheets.
Repeat with the second disk of dough. Here's the trick: Don't press down on the dough when cutting—just gently guide the knife through. If the dough starts to warm up or soften while you work, pop it back in the fridge for 10 minutes to firm it up again. This ensures your cookies stay crispy and don't spread too much during baking.
Bake to Golden Perfection
Bake the cookies in the preheated oven for 10-12 minutes, or until the edges are golden brown and the centers still look slightly underdone. They'll continue cooking on the hot pan after you remove them from the oven. Don't overbake—you want them crispy on the outside but still soft in the middle. If you're unsure, check at the 10-minute mark and use the toothpick test: Insert a toothpick into the center of a cookie. If it comes out with a few moist crumbs but no wet batter, they're ready.
Remove the cookies from the oven and let them cool on the baking sheet for 5 minutes before transferring to a wire rack to cool completely. The toffee bits and chocolate chips should be slightly melted but still visible—this is what gives these cookies their signature texture. Enjoy them warm for the ultimate experience, or store in an airtight container for up to 5 days. These cookies are so good, they'll disappear faster than you can say "buttercrunch."
Pro Tips For Making Buttercrunch Cookie
- USE COLD BUTTER: I learned this the hard way—cutting butter straight from the fridge and mixing it into the dough makes for a crispier, more buttery cookie. If your butter’s too soft, chill the dough for 30 minutes before baking, or your cookies will spread into sad, flat pancakes.
- MEASURE FLOUR RIGHT: Scooping flour from the bag and packing it into your cup? Stop. Spoon it in lightly, then level with a knife—no pressing. Buttercrunch cookies need structure, not density, or you’ll end up with a chewy mess instead of that signature crisp snap.
- BAKE UNTIL EDGES ARE HARD: Don’t pull them out at the first sign of golden. Wait until the edges are set and the centers look just underdone—they’ll firm up as they cool. Overbaking turns them tough; underbaking leaves them gummy. Aim for 10–12 minutes, but watch your oven—it’s the only way to nail that perfect crunch.
- TOAST THE TOFFEE: Skip the pre-packaged toffee bits if you can. Pulse store-bought ones in a food processor until they’re fine crumbs, then toast them in a dry pan for 2–3 minutes until fragrant. Freshly toasted toffee adds a caramel depth that store-bought bits can’t match—trust me, your cookies will taste like you put in effort.
Make-ahead tips for this recipe
Dough Prep Ahead
Make your life easier by prepping the dough 24 hours in advance. After mixing, divide it into disks, wrap tightly in plastic wrap, and refrigerate. The longer it chills, the firmer the butter stays, ensuring those signature crispy edges.
I often make the dough the night before—it’s one less thing to do on baking day. 🧈
Freeze for Future Baking
For ultimate convenience, freeze the dough disks for up to 3 months. Wrap each disk individually in parchment paper, then place in a ziplock freezer bag. When ready to bake, thaw the dough in the fridge for 2-3 hours or at room temperature for 1 hour.
No need to defrost—just pop it straight onto the floured surface and roll. This is a game-changer for busy weeks! ❄️
Bake from Frozen Shortcuts
Skip thawing entirely by baking the dough straight from frozen! Roll and cut the dough as usual, but place the cut cookies on a parchment-lined baking sheet. Bake at 350°F for 14-16 minutes, checking at the 12-minute mark.
The extra time ensures the centers cook through while keeping the edges crisp. Perfect for last-minute cravings! ⏰
Storage for Maximum Freshness
Store baked cookies in an airtight container with parchment paper between layers to maintain crispness. They’ll stay fresh for 5-7 days at room temperature. For longer storage, freeze the baked cookies in a single layer on a tray before transferring to a bag.
Reheat in a 350°F oven for 3-5 minutes to restore that warm, gooey texture. 💫
Gift-Worthy Packaging
Make these cookies extra special by packaging them in cellophane bags tied with a ribbon. Line the bags with parchment paper to keep them crisp. Add a handwritten note or a sprinkle of coarse sugar for a festive touch.
These make thoughtful gifts for holidays, teacher appreciation, or just because—your recipients will love the effort! 🎁
Reheating for Second Bites
Revive stale cookies by placing them on a baking sheet and warming in a 300°F oven for 5-7 minutes. For a quicker fix, microwave for 10-15 seconds (cover with a damp paper towel to prevent drying).
The edges will crisp up again, and the chocolate centers will soften just enough to feel fresh. Trust me, no one will guess they were leftovers! 🔥
Nutrition facts
Frequently asked questions
Why do Buttercrunch cookies need to chill before baking?
Chilling the dough for at least 1 hour is essential to solidify the butter, preventing excessive spreading during baking. This creates those signature crispy edges while keeping the centers tender. Cold dough also helps distribute the toffee bits and chocolate chips evenly for maximum crunch in every bite.
Can I substitute toffee bits for something else?
If you don't have toffee bits, use chopped pecans or walnuts for a similar crunch. For a sweeter alternative, try crushed pretzels or butterscotch chips. Just remember that toffee bits provide that signature caramel flavor these cookies are known for.
How do I know when the cookies are fully baked?
Look for edges that are golden brown and slightly crisp, while the centers should still appear slightly underdone. The toothpick test works best: Insert a toothpick into the center—if it comes out with a few moist crumbs but no wet batter, they're perfect. Overbaking makes them dry and crumbly.
Can I make these cookies gluten-free?
Yes, but with adjustments. Replace the 2 cups all-purpose flour with a 1:1 gluten-free baking flour blend (like Bob's Red Mill) plus 1 tsp xanthan gum. Add 1 tbsp milk to the dough to help bind it. Expect slightly softer cookies—they won't be as crisp as traditional versions.
What's the best way to store leftover cookies?
Keep them crisp by storing in an airtight container with parchment paper between layers. They'll stay fresh for 5-7 days at room temperature. For longer storage, freeze the baked cookies in a single layer on a tray before transferring to a bag. Reheat in a 300°F oven for 5 minutes to restore that warm, gooey texture.