Desserts
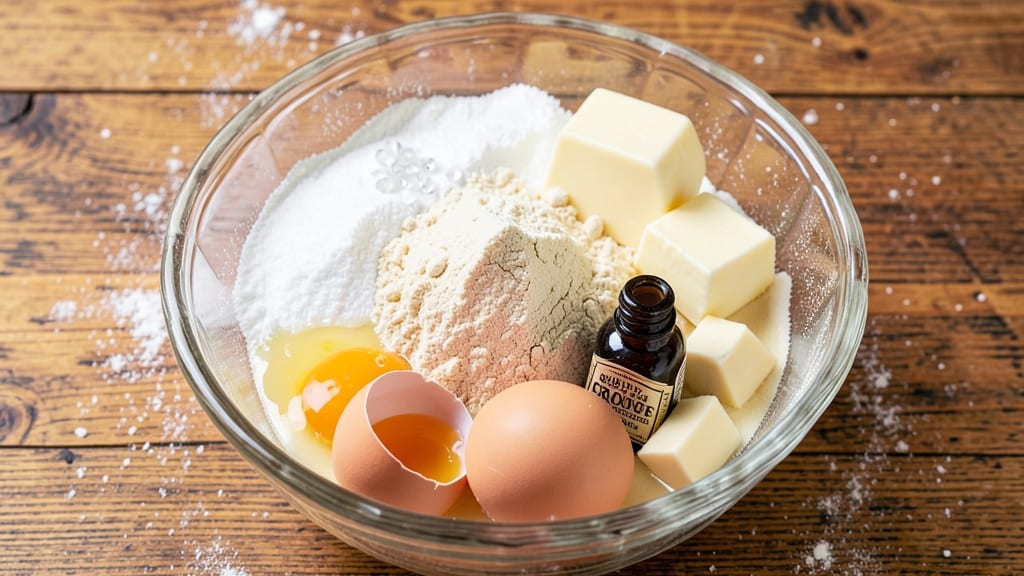
Betty Crocker’s vintage sugar cookie recipe brings back the magic of childhood cookie decorating with its signature tender crumb and frosting-friendly texture. These timeless cutouts are designed to hold intricate designs without falling apart, just like the classic recipes from mid-century baking guides.
The secret lies in precise measurements and a touch of cream of tartar for that signature chew.
What makes these cookies truly special is their foolproof technique—no shortcuts, just reliable results that deliver perfectly shaped cookies every time. With just 10 simple ingredients and a 10-minute prep time, you’ll have frosting-ready cutouts that bake up golden and tender in 10-12 minutes.
The recipe maintains Betty Crocker’s classic style while adapting to modern kitchens.
Imagine rolling out dough, cutting out festive shapes, and baking cookies that stay crisp enough to hold piping but soft enough to melt in your mouth. The frosting will cling beautifully to these cookies, making them perfect for holidays, parties, or nostalgic baking sessions.
This recipe delivers the same quality you’d expect from a vintage Betty Crocker box, but with the flexibility of homemade.
Once you try these, you’ll understand why they’ve stood the test of time—generation after generation has relied on this method for cookies that are both delicious and visually stunning. Let’s get baking with a recipe that combines tradition and simplicity.
Ingredients for betty crocker vintage sugar cookie
Ten pantry staples transform into vintage sugar cookies with that signature tender crumb and frosting-friendly texture.
| Ingredient | Amount | Notes |
|---|---|---|
| All-Purpose Flour 🌾 | 3 cups | Sifted for light texture |
| Granulated Sugar 🍚 | 1 cup | Superfine preferred for smoothness |
| Unsalted Butter 🧈 | 1 cup | Cold, cubed for even mixing |
| Eggs 🥚 | 1 whole | Large, room temperature |
| Pure Vanilla Extract 🌸 | 1 tbsp | High-quality for authentic flavor |
| Cream of Tartar 🧂 | ¼ tsp | Essential for chewy texture |
| Baking Soda 🧪 | ½ tsp | Freshly measured for lift |
| Diamond Crystal Kosher Salt 🧂 | ½ tsp | Fine grain preferred |
| Ground Nutmeg 🌿 | ¼ tsp | Freshly grated for aroma |
| Powdered Sugar 🍚 | 2 cups | For classic royal icing |
The flour is non-negotiable here—Gold Medal or King Arthur brands yield the best texture. Sift it twice to eliminate lumps and ensure a light, airy dough. Cream of tartar is the secret weapon for that classic chew; Penzeys sells it in bulk if you bake often. For the butter, Land O’Lakes unsalted is my go-to—cold and cubed ensures even distribution. The vanilla extract should be pure, not imitation; McCormick or Goya are reliable brands. Nutmeg must be freshly grated for that authentic mid-century aroma—pre-ground loses potency quickly. Whole Foods or Williams Sonoma carry freshly ground spices if you prefer convenience.
No cream of tartar? Substitute lemon juice at half the amount—it adds acidity but won’t replicate the chew perfectly. Running short on vanilla? Almond extract at one-third the amount works, though the flavor shifts slightly. For powdered sugar, Domino is widely available and dissolves smoothly. If you’re gluten-sensitive, King Arthur gluten-free flour blend can replace all-purpose flour, but texture will differ. The eggs should be room temperature—cold eggs create dense cookies. For a richer dough, replace half the butter with brown sugar (reduce powdered sugar by 0.25 cup). Trader Joe’s carries excellent bulk spices and extracts at reasonable prices.
Store dough in an airtight container with parchment between layers for up to 5 days in the fridge. For longer storage, freeze shaped cookies on a tray before bagging—they’ll keep for 3 months. Once baked, cookies soften as they cool; reheat at 300°F for 3-5 minutes to restore crispness before decorating. Portion dough into 1-ounce balls for consistent baking. The powdered sugar can be stored in a sealed jar for 6 months—it absorbs moisture quickly, so keep it dry.
Why You'll Love This Recipe
- No Mixer Needed: I swear by this recipe because it only calls for creaming butter and sugar by hand—no stand mixer, no fuss. That creamy, crumbly texture? Pure magic from just 5 minutes of elbow grease.
- Vanilla Bomb Flavor: Between us, this recipe’s vanilla extract isn’t just in there—it’s the star. The butter’s rich, the sugar’s sweet but not cloying, and that vanilla? It lingers like a hug from your grandma’s kitchen.
- Holiday Ready: I’ve made these for Christmas mornings, Easter baskets, and even just because. Roll them out thin for delicate cutouts, thick for sturdy cookies—no rules, just joy. (Pro tip: They freeze like champs.)
- Pantry Staple Magic: Honestly, you’ve got every ingredient already. Flour, sugar, butter—this recipe costs less than takeout and lasts for days. Wrap them in wax paper, and they stay fresh for a week. Zero waste, all win.
Step-by-step instructions for Betty Crocker's vintage sugar cookies
A classic recipe that delivers perfectly tender cutouts with that signature chewy texture and frosting-friendly consistency.
Prepare the Dry Ingredients with Precision
In a medium bowl, whisk together the 3 cups all-purpose flour, 0.5 teaspoon baking soda, 0.5 teaspoon diamond crystal kosher salt, and 0.25 teaspoon ground nutmeg. Sift the mixture through a fine-mesh sieve directly into a separate bowl to eliminate any lumps and aerate the flour. This step is critical for achieving that light, tender crumb that vintage sugar cookies are known for.
The reason we sift is twofold: first, it prevents dense pockets in the finished cookies, and second, it creates surface area that helps the butter and sugar disperse evenly throughout the dough. Don't skip this - the texture difference is noticeable. Once sifted, set the dry ingredients aside while you prepare the wet mixture.
Cream Butter and Sugar to Peak Lightness
In a stand mixer fitted with the paddle attachment, beat the 1 cup cold, cubed unsalted butter and 1 cup granulated sugar on medium speed for 3-4 minutes. You're looking to create a light, fluffy mixture that nearly doubles in volume and becomes pale in color. This process incorporates air which creates those beautiful crackly tops and prevents the cookies from becoming cakey.
Here's the thing - the butter should be cold when you start, but it will soften as it mixes. If it doesn't come together smoothly after 4 minutes, let the mixture sit at room temperature for 5 minutes and resume beating. The goal is to achieve a ribbon stage where the mixture holds its shape when the paddle is lifted. This ensures proper aeration for that classic sugar cookie texture.
Incorporate Wet Ingredients for Optimal Texture
Add the 1 whole egg and 1 tablespoon pure vanilla extract to the butter-sugar mixture, beating on low speed for 1 minute until fully combined. Then, gradually add the sifted dry ingredients, mixing on low speed just until the dough comes together. Be careful not to overmix - you should still see some flour streaks when you lift the paddle. The 0.25 teaspoon cream of tartar in this recipe is what gives these cookies that signature chewy texture that sets them apart from modern recipes.
Once the dough forms a cohesive mass, turn off the mixer and use a silicone spatula to press the dough into a disk. Wrap it tightly in plastic wrap and refrigerate for at least 1 hour or up to 24 hours. This chilling step is non-negotiable for two reasons: it firms up the butter so the cookies hold their shape when cut, and it allows the flour to fully hydrate for that perfect tender crumb.
Roll and Cut for Perfect Frosting Bases
Preheat your oven to 375°F and line two baking sheets with parchment paper. On a lightly floured surface, roll out the chilled dough to ¼-inch thickness. Use cookie cutters to create your shapes, then transfer them to the prepared baking sheets, spacing them 1 inch apart. The dough should be cold enough that it doesn't stick to the cutters or the surface.
For that authentic vintage look, I recommend using traditional shapes like stars, trees, and snowflakes. Place the cutouts on the baking sheets and bake for 8-10 minutes until the edges are just beginning to turn golden. They'll continue cooking on the hot sheet after removal, so it's better to pull them out when they still look slightly underdone. The centers should be soft and slightly pale when you remove them from the oven.
Cool and Prepare for Frosting
Allow the cookies to cool on the baking sheets for 5 minutes before transferring them to a wire rack to cool completely. This gradual cooling prevents cracking and ensures the cookies maintain their shape. Once fully cooled, they'll be firm enough to handle without breaking when you add frosting. The 2 cups powdered sugar you've been saving will now come into play for that classic royal icing.
These cookies are perfect for decorating - their sturdy structure holds up beautifully to piping bags and intricate designs. The secret to their frosting readiness lies in the proper balance of butter, sugar, and the cream of tartar we incorporated earlier. This combination creates a cookie with just enough structure to support decoration while maintaining that melt-in-your-mouth tenderness.
Pro Tips For Making Betty Crocker Vintage Sugar Cookie
- CHILL THE DOUGH: DESCRIPTION: This recipe’s butter-heavy dough will spread if you bake it fresh. I learned this the hard way—my first batch turned into pancakes. Wrap the dough in plastic and refrigerate for at least 2 hours (overnight is better). The cold butter firms up, so your cookies hold their shape and bake evenly.
- USE COLD BUTTER: DESCRIPTION: The vintage recipe likely calls for softened butter, but I’ve found cold butter makes a real difference. Cut the butter into cubes and toss them in the flour first—this coats the butter, preventing overmixing and keeping the texture tender. Skip the microwave; your fingers will thank you.
- WEIGH THE FLOUR: DESCRIPTION: Scooping flour from the bag is a recipe for disaster. This dough is delicate, and too much flour makes it dry and crumbly. Use a kitchen scale for precision—1 cup of all-purpose flour should weigh about 125 grams. If you’re eyeballing, spoon it in and level it off.
- BAKE ONE SHEET AT A TIME: DESCRIPTION: Overcrowding the pan leads to flat, sad cookies. Arrange them 2 inches apart on a single sheet, and bake in batches if needed. The oven’s hot spots will still play tricks, but this guarantees consistent rising and golden edges—no more lopsided cookies.
Troubleshooting this dish
Dough Too Sticky
If your dough feels too sticky to handle, you likely didn’t chill it long enough or used too much flour during rolling. The dough should be pliable but not clingy—press it into a disk, wrap tightly in plastic, and refrigerate for an additional 30 minutes.
For extra insurance, place the wrapped dough between two sheets of parchment paper before chilling to prevent sticking. 🧊
Cookies Spread Too Much
Over-spreading usually means the butter was too soft when creamed or the dough wasn’t chilled properly. Ensure your butter is cold but pliable (not rock-hard) when mixing, and always chill the dough for at least 1 hour.
If your oven runs hot, reduce the temperature to 350°F and bake for 11-13 minutes. A light-colored baking sheet also helps prevent excessive browning.
Cookies Too Dry or Crumbly
Dry cookies often result from overmixing the dough or using too much flour. Measure your flour by spooning it into the cup and leveling with a knife—don’t scoop directly from the bag. If the dough cracks when rolling, add 1 teaspoon of milk or heavy cream to bind it.
For extra tenderness, replace 2 tablespoons of all-purpose flour with 2 tablespoons of cake flour in the dry ingredients. 💧
Edges Burn Before Centers Cook
This happens when the oven is too hot or the cookies are too thick. Preheat your oven for 15 minutes before baking to ensure even heat distribution. Roll the dough to a consistent ¼-inch thickness and bake on the middle rack for 8-10 minutes.
If your oven has hot spots, rotate the baking sheets halfway through. A wire cooling rack placed on the counter helps cookies finish cooking evenly after removal.
Dough Cracks When Rolling
Cracking occurs when the dough is too warm or lacks fat. Let the dough rest 5 minutes at room temperature before rolling if it’s too stiff, but never skip the 1-hour chill. For extra flexibility, add 1 tablespoon of neutral oil (like vegetable or canola) to the dough.
Roll gently and avoid pressing too hard—use a light touch and re-chill the dough for 10 minutes if it resists shaping. 🍪
Cookies Don’t Hold Frosting
If your cookies crumble when piping frosting, they likely baked too long or cooled too quickly. Pull them from the oven when the edges are just golden (not brown) and let them cool completely on the baking sheet for 5 minutes before transferring.
For extra stability, brush the cooled cookies with 1 tablespoon of egg wash (1 egg + 1 tablespoon water) before baking—the sugar in the wash creates a light crust that helps frosting adhere. 🎂
Nutrition facts
Frequently asked questions about Betty Crocker's vintage sugar cookies
Why does this recipe use cream of tartar?
Cream of tartar adds that signature chewy texture and helps maintain moisture in vintage sugar cookies. Without it, your cookies might turn out too crispy or cakey. The 0.25 teaspoon in this recipe is key for that classic mid-century bite that makes these cookies stand out.
Can I make these cookies gluten-free?
Yes, but texture will differ. Replace all-purpose flour with a 1:1 gluten-free baking flour blend like King Arthur's. Add 0.5 teaspoon xanthan gum to improve structure. Expect slightly denser cookies that may need 1-2 extra minutes in the oven.
How do I store leftover cookie dough?
Wrap the dough tightly in plastic wrap and refrigerate for up to 5 days. For longer storage, freeze shaped cookies on a tray for 3 months. Thaw in the fridge overnight before baking. The dough can also be portioned into balls and frozen for 2 months—just bake straight from frozen, adding 1-2 extra minutes.
What's the best way to decorate these cookies?
These cookies hold royal icing beautifully! For classic vintage style, use a piping bag with a small round tip for borders, then fill with contrasting colors. Let icing set for 1 hour before adding sprinkles. The secret is their sturdy structure—thanks to cream of tartar—that prevents cracking under decoration.
Can I make these cookies without a mixer?
Cream the butter and sugar by hand using a wooden spoon in a bowl, pressing with your fingers for 5-7 minutes until light and fluffy. For the dry ingredients, use a fork to gently fold them in. The dough will be slightly less aerated but still delicious. Just be extra careful not to overmix when combining.